
Did you finally choose a CPU for your PC and need assistance with installation? CPU is the heart of a PC and should be installed right. Intel or AMD, the process can get tricky if it’s your first rodeo. Wish there was something of a reference!
Worry no more, as I have the perfect guide for you to follow, where I discuss the steps with pictures and requisite precautions to help you safely install the CPU, regardless of the chip you choose.
And that’s not all. I will even discuss the course you need to take post installation. So let us get right to it, shall we?
Quick Navigation: Install Intel CPU | Install AMD CPU
Contents
Things To Do Before Installing a CPU:
- Check for Motherboard Compatibility: A quick way is to check the socket type of the motherboard — LGA, PGA, or TR4, and compare the same with the concerned CPU’s socket. If they match, they are compatible, simple!
- Turn the Power Off: This goes without saying. You should turn off the power before moving ahead with the installation. Just a tip: powering the device off means unplugging the same from the wall socket.
- Go Anti-Static: Powering off is important, but what about the static electricity that your body might be holding? Taking anti-static steps might help here. You can either touch a metallic object before moving to the installation or consider wearing an anti-static band or wrist strap for seamless grounding.
- Check for Pin alignment: If you have already checked for sockets, make sure the Pins are also aligned. If you have already purchased the CPU, check for “bent” pins and return the piece if you encounter even a single deformity.
- Get Hold of Thermal Paste: Even though the CPU fan is expected to provide cooling, you should never ignore the thermal paste. A good practice is to apply the same to the Central Processing Unit to help with heat dissipation.
- Remove Cooler: If you’re upgrading the CPU, check if the existing cooler is compatible or not. If not, remove the same before you apply the thermal paste.
And that’s more or less everything you need to know before you even deliberate an installation of your newly purchased CPU.
How To Install an Intel CPU?
CPU and motherboard can be a match made in heaven, but only if you know what you are doing. Well, if you are a novice, note that you must approach Intel and AMD CPU installations differently.
Let’s start by discussing the installation of Intel CPUs and their motherboard compatibility. Intel uses the LGA socket schema to ensure that its CPUs connect seamlessly to the motherboards.
For the unversed, LGA stands for Line Grid Array. Simply put, LGA sockets connect to the motherboards like Lego building blocks.
Here is how you can identify an LGA socket and, therefore, the compatibility:
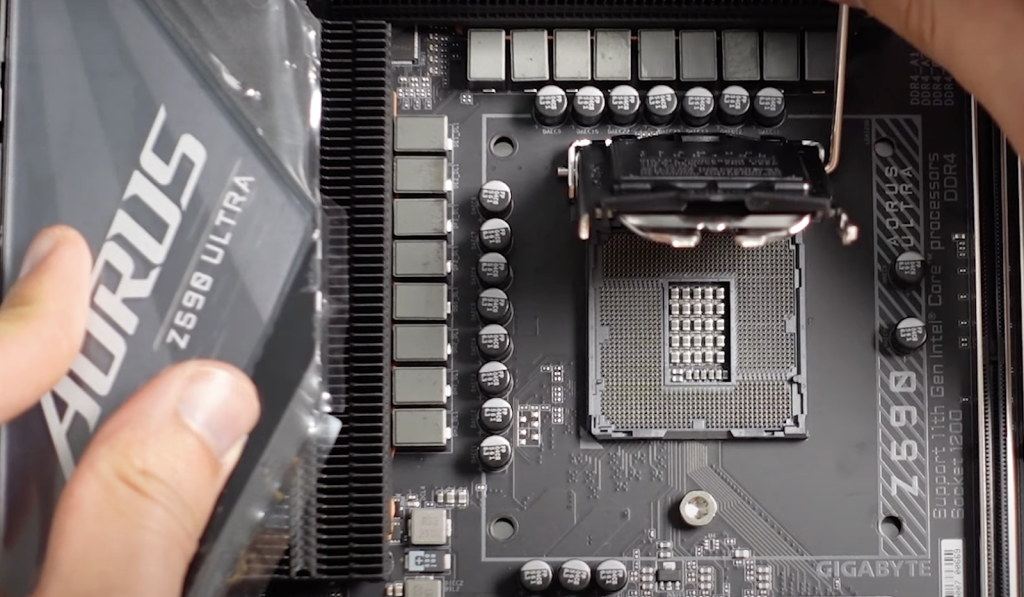
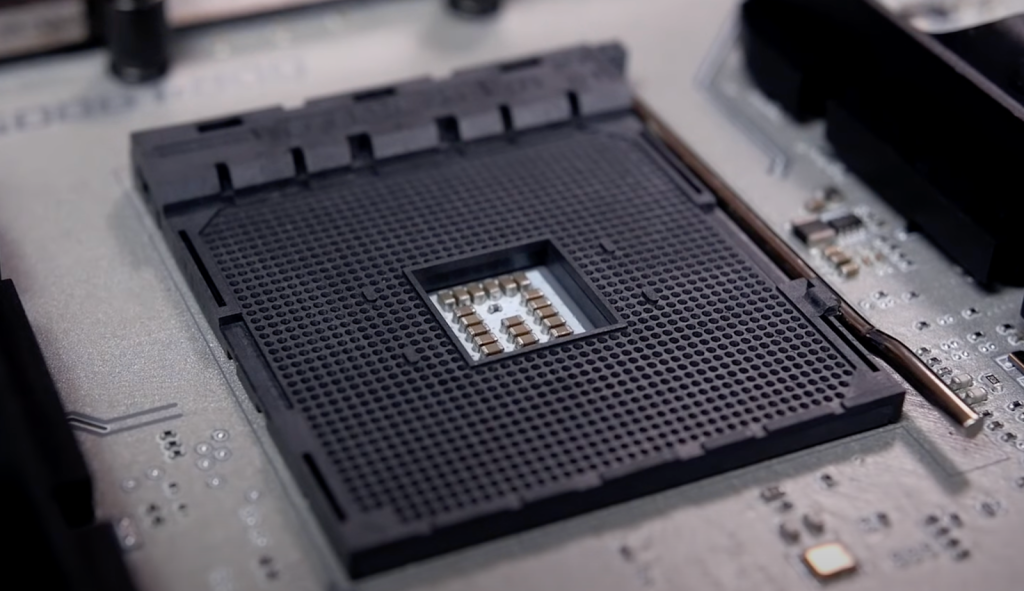
Look for small metallic pins at the very end (bottom) of the CPU socket. If the CPU is from Intel and compatible with the relevant socket, it will have several metallic contact points in alignment with the mentioned socket.
Intel is known to upgrade its LGA sockets along with the processor line, with the pins and contact points increasing with each iteration. To simplify further, LGA sockets help install the CPU on the motherboard, precisely for the Intel variants.
Also, in the LGA approach, the socket has pins, and the CPU has metallic contact points or holes aligned with the pins.
But that just explains the socket type! Here is a bit regarding the Intel CPUs and why you might want to go with them:
- Better power efficiency
- Better price-to-performance ratio
- More popular among games and high-end video editors
From the discussion above, it is clear that you need to check the pin and contact point alignment before proceeding with the installation. For other prerequisites, you can always refer to the section above.
Now that the initial requirements are out of the way, here are the steps to take note of:
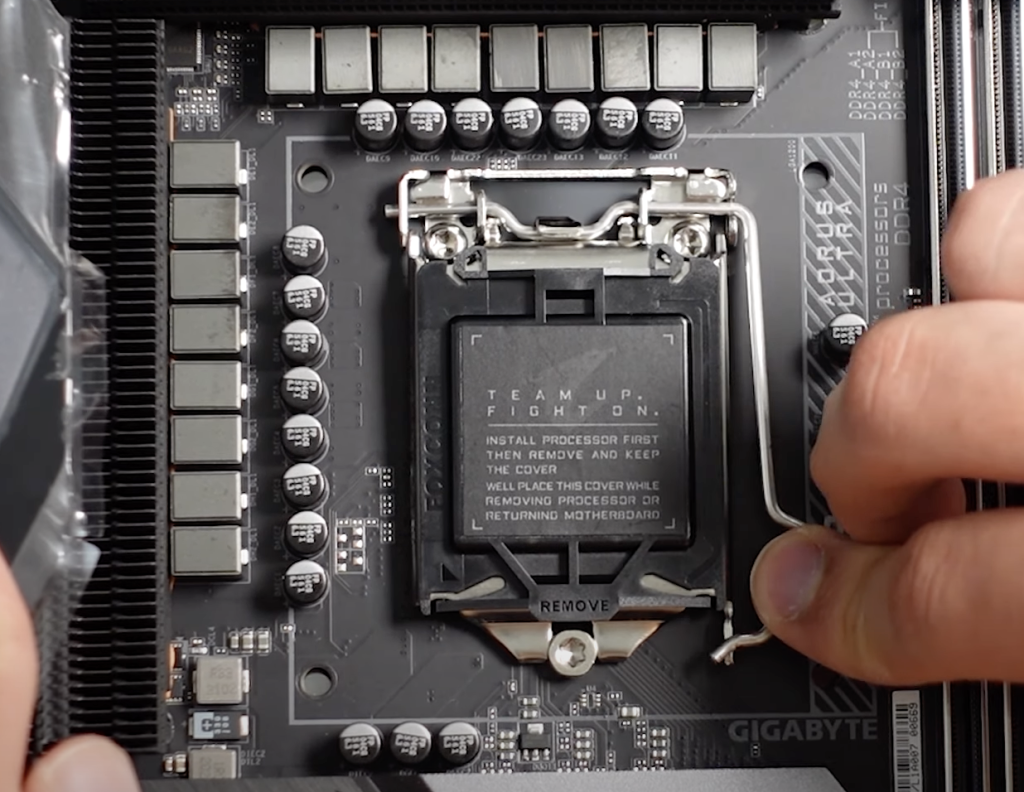
Step 1: Check Sockets and Retention Arm(s)
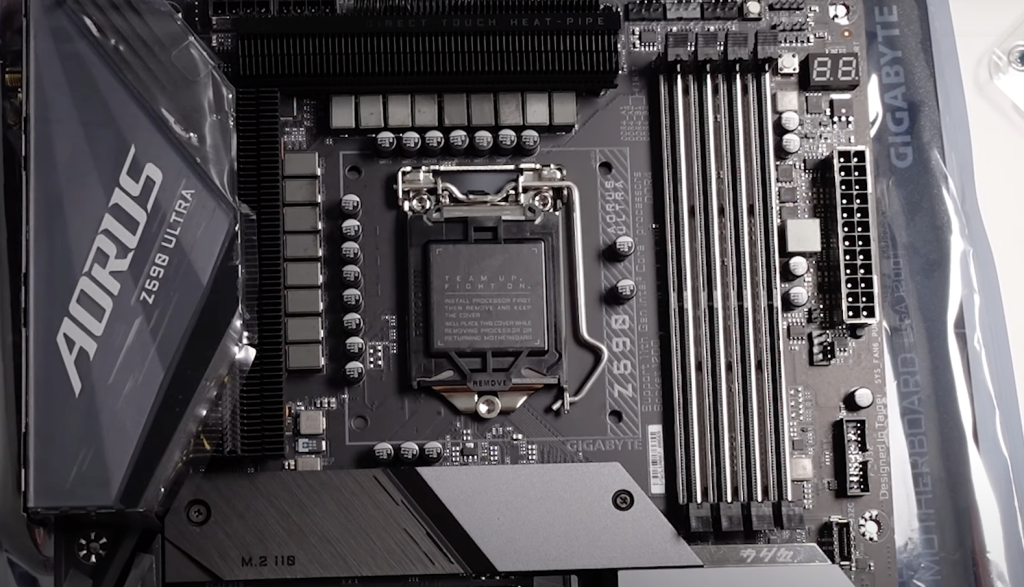
Once you check the socket compatibility, look if the retention arms are in place. Retention arms are socket-adhering CPU holders. Check if the retention arms are capable enough and can secure the CPU or not. Note that a wobbly CPU is no good.
As the retention arms are mechanical bits, it is advisable to check them beforehand and replace the entire socket if needed.
Then again, if you are building a PC for the first time and do not know how to install Intel CPU, here is how to locate the socket and the retention arms. Take a gander at the center of the motherboard. The largest entity is the CPU socket.
The small arms, located right on the socket’s edge, are the retention arms — also referred to as the load plates. They are button-like pressable entities.
Step 2: Determine CPU Orientation
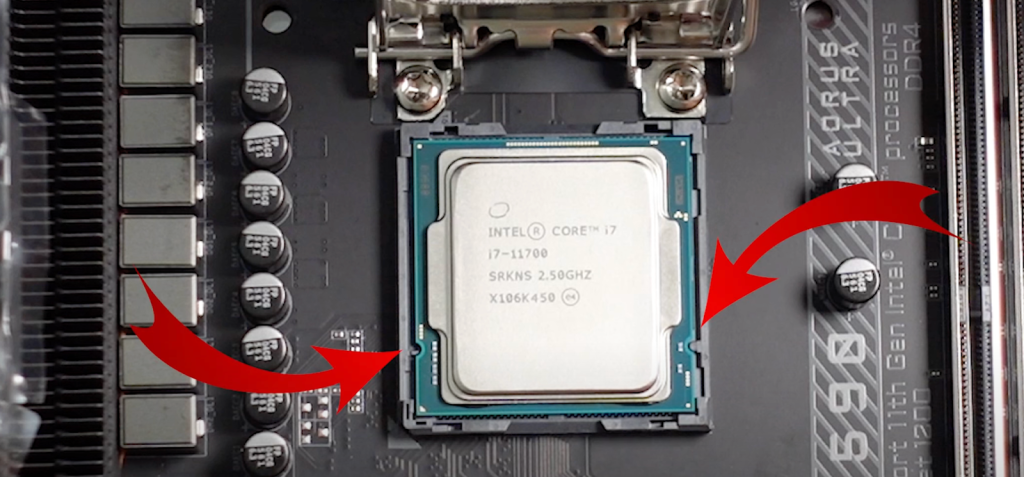
Every CPU have notches on them. These notches are like markers that help you check the pin and contact point alignment. Following the notches eliminates any chance of incorrect insertion.
You can find these notches near the retention arms. Correct installation means that the contacts and pins follow the direction of the notches.
Step 3: Install Your Intel CPU
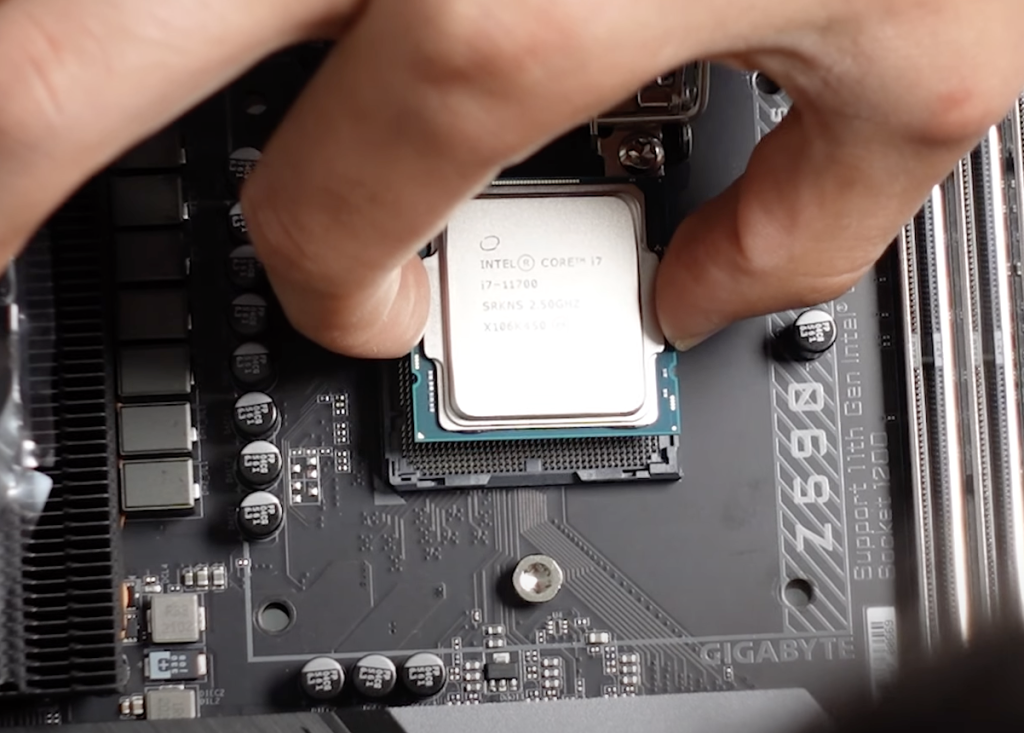
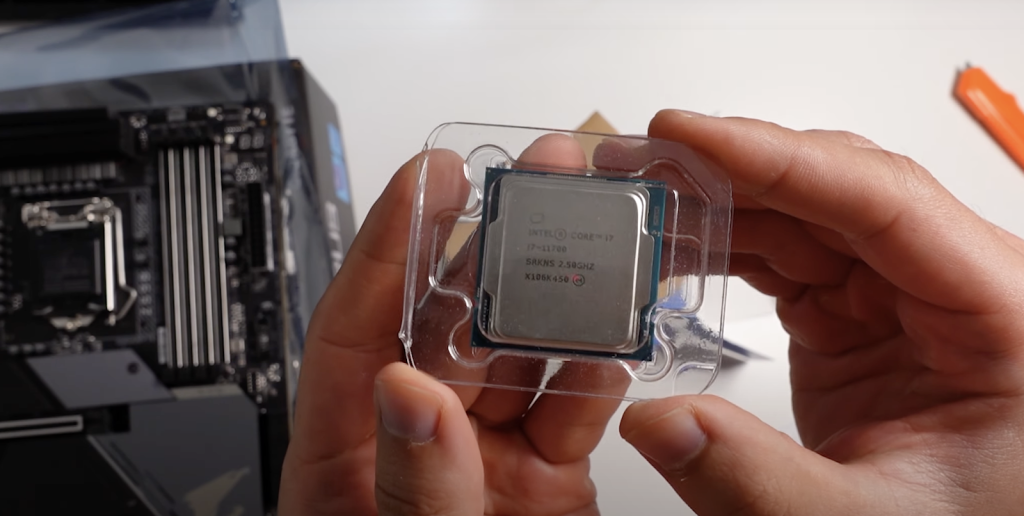
Once you know the alignment and have the socket compatibility and retention arms out of the way, you need to assemble the CPU. The idea here is to always hold the CPU by the edges, avoid making any contact with contacts and pins located at the bottom, and refrain from pushing the processor way too hard.
Precaution:
You should never drop the processor or apply excessive force while pushing it into the socket. Even though the retention arms are in place, you should take care that the heat sink (meant for heat dissipation) is in place. And yes, do use that anti-static strap, as mentioned above.
Step 4: Close the Retention and Update
The last step, post adding the CPU, is to ensure that the retention arms have successfully secured the processor. The trick is to align the CPU in the direction of the notches, gently push the processor down, press lightly, and wait for a “click” sound.
Once the installation is done, you need to update the motherboard firmware and drivers. This ensures that the device properly recognizes the CPU.
Note: The plastic bracket that secures the socket will pop out. Keep it handy, as you might need it if you want to get the motherboard back in the packaged condition.
How To Install an AMD CPU?
Unlike Intel’s LGA socket schema, AMD processors follow the PGA and TR4 approaches. Learn more differences between LGA and PGA sockets.
Circle back to the Intel bit and remember that the LGA approach meant pins on the socket and contact holes on the CPU. For the PGA-type installation, CPUs have pins, and sockets have holes/ contacts. Also, PGA stands for “Pin Grid Array.”
TR4 sockets are like LGA, with pins located on the socket. However, the similarities end there as TR4 sockets have circular pin patterns as opposed to the square patterns exhibited by LGA sockets.
The TR4 approach involves a bigger surface area and can accommodate IHS or “Integrated Heat Spreaders” for better thermal efficiency. And yes, TR4 is only meant for high-end and premium AMD processors.
Apart from the info presented above, there prerequisites related to compatibility, anti-static approach, and more remain the same, even for the AMD processors.
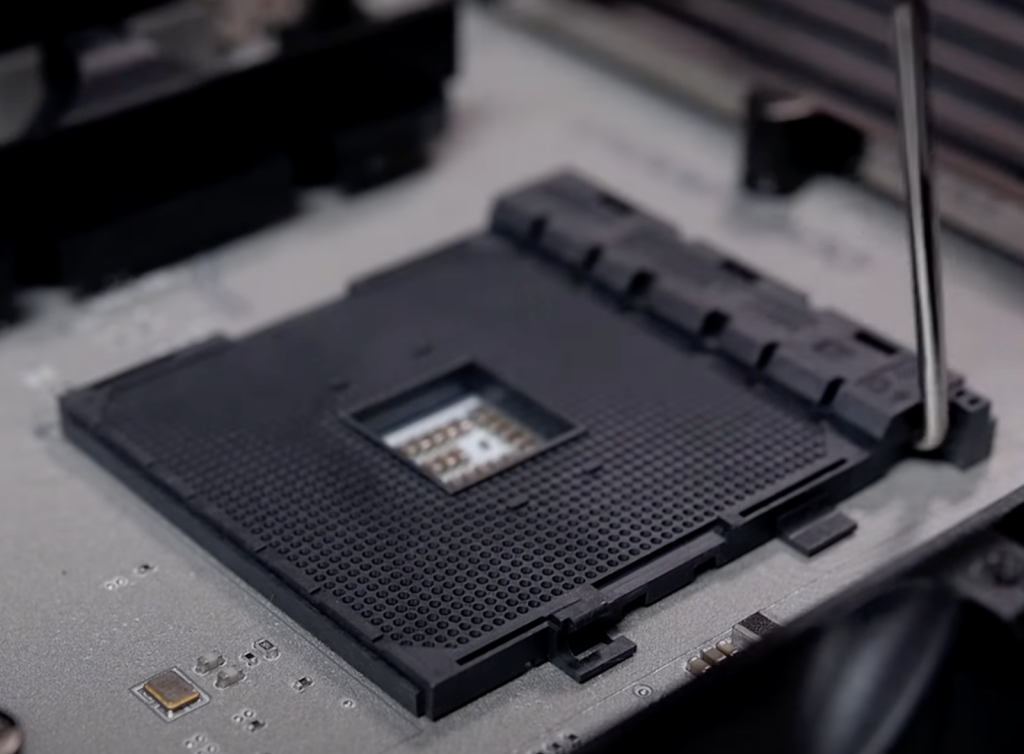
Step 1: Locate the Socket and Retention Arms
This approach is similar to a standard LGA socket-specific installation. You need to look for the socket right in the center of the motherboard, then locate the small plastic-like retention arms around the edge, and see if everything from the pin on the socket to the contact points on the processor is in place and aligned or not.
Step 2: Cross-Check CPU Orientation
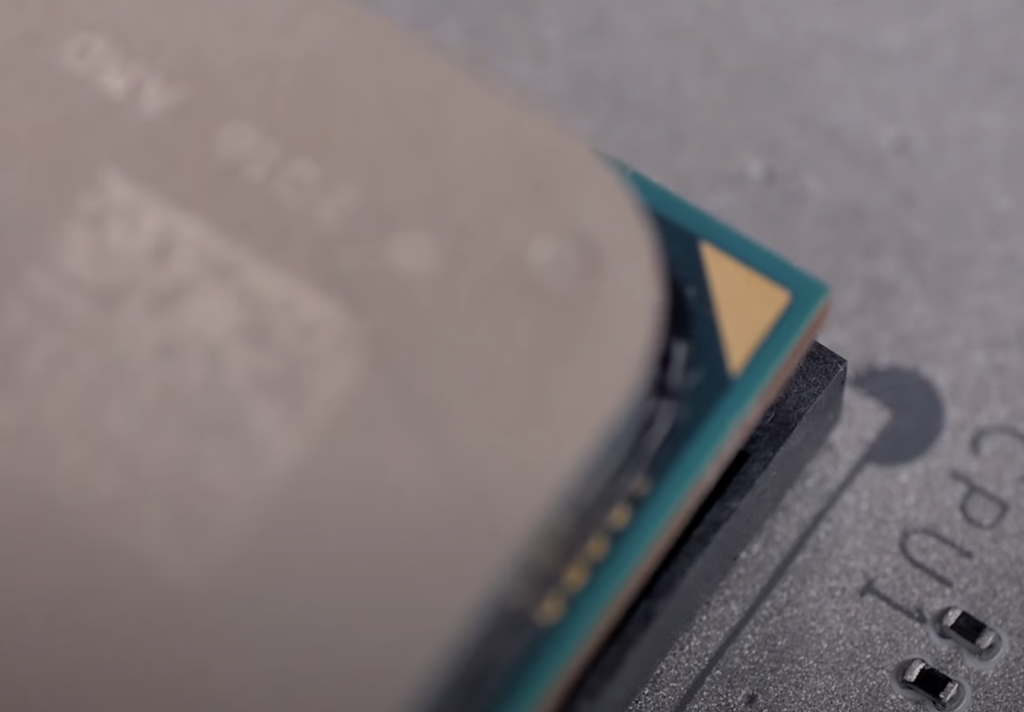
Like the Intel CPUs, even AMD CPUs come with notches. In the case of AMD processors, you usually find a single arrow pointing toward the right installation direction. Follow the same, and you are good to go.
Step 3: Install Your AMD CPU
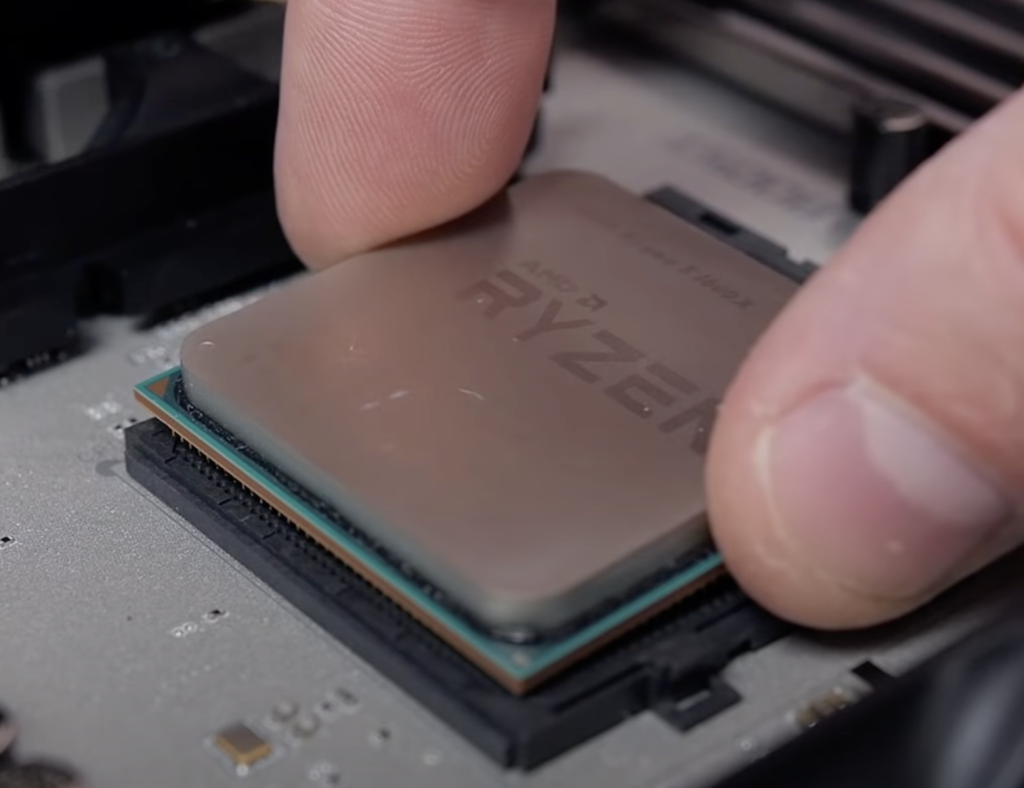
Hold the CPU carefully, avoid touching the contact points, and never drop the same. While installing, press gently. Do consider grounding yourself to avoid static electricity shocks. Note that the PGA sockets are “Zero insertion force” sockets, and you simply need to drop the CPU onto the processor for installation.
Step 4: Secure the CPU
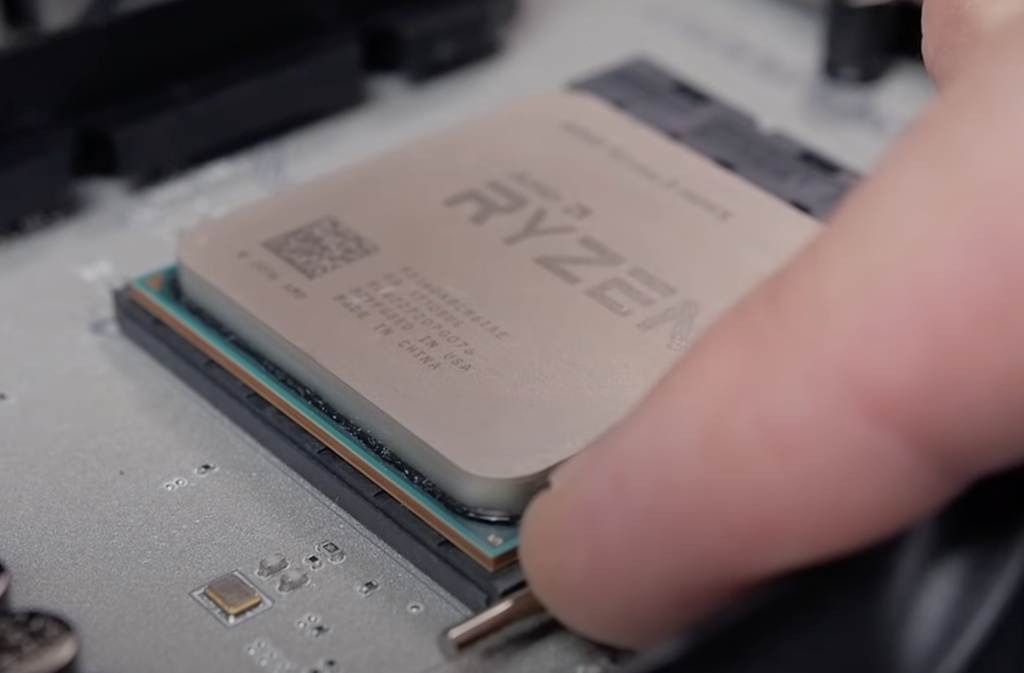
Once again, check if the retention arms are properly securing the processor. And consider using thermal paste if there are many cores, and you might end up needing some extra cooling in the future.
Note: Some Ryzen CPUs still support the PGA-type installation.
How To Install an AMD CPU with TR4 Socket?
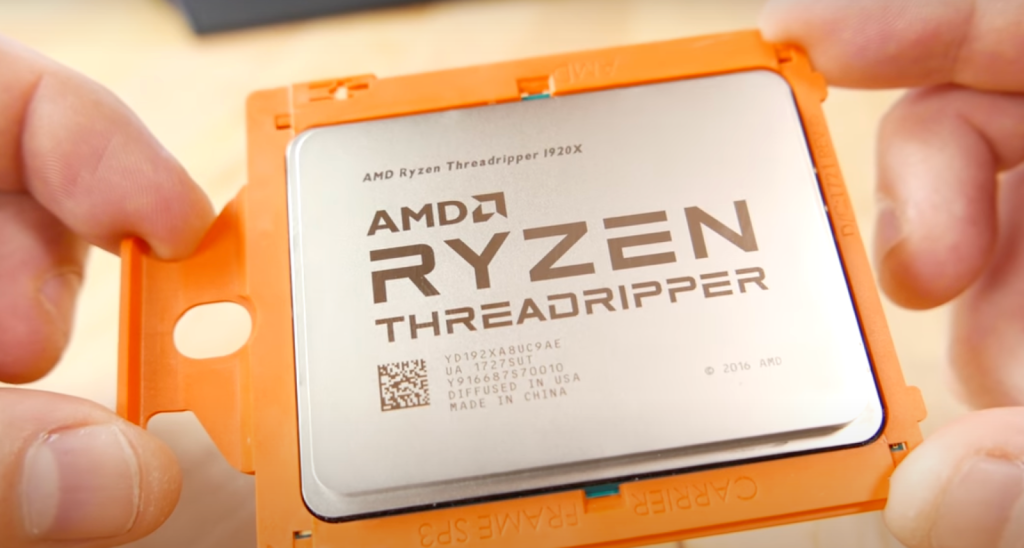
Before moving ahead with TR4 CPU installation, meant for premium AMD variants, we must know why and how a TR4 socket schema is different from LGA and PGA schemas. The TR4 socket approach is meant for the Threadripper variants — having additional cores and larger surface areas.
The massive size and different shapes also make the retention mechanism different — involving a separate retention bracket and a screwdriver. However, before we move to the steps, it is necessary that you get access to the Trox screwdriver.
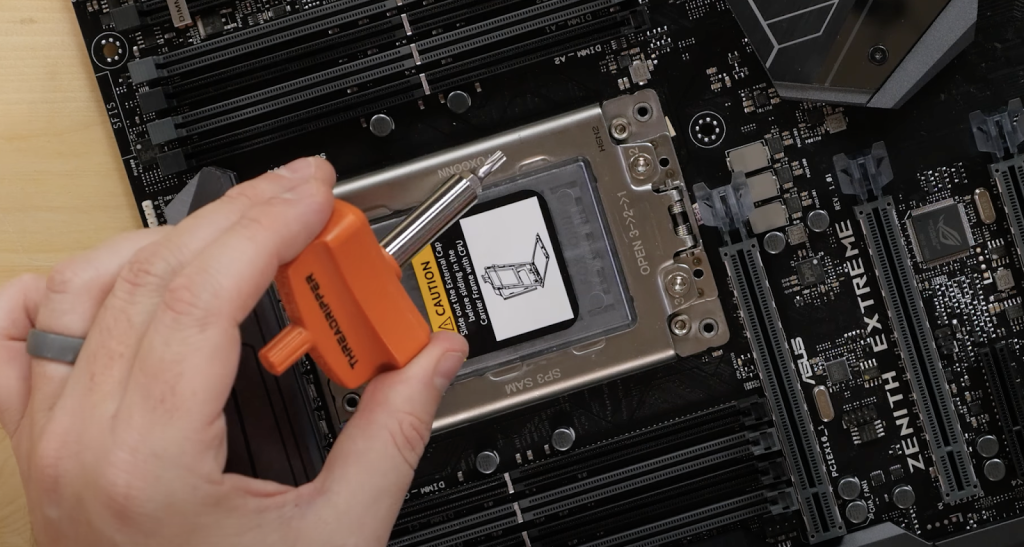
This accessory usually comes with the TR4 CPU package and is meant to secure the bigger retention arm (bracket in the case of TR4). Plus, the Trox screwdriver is also useful for installing the CPU cooler — a necessary add-on for high-end AMD processors.
How To Install Ryzen CPU on the Motherboard?
Here is a step-pronged that answers the important question:
Step 1: Locate the Socket and Screws
The socket sits distinctly in the middle. You will find three screws on the TR4 socket, which is expected to even have the “TR4” label on it. Do note that the screws will be labeled like this:
Also, note that the opening and closing instructions will be available. This would tell you which screw to unscrew first.
Step 2: Loosen Screws to fit in the CPU
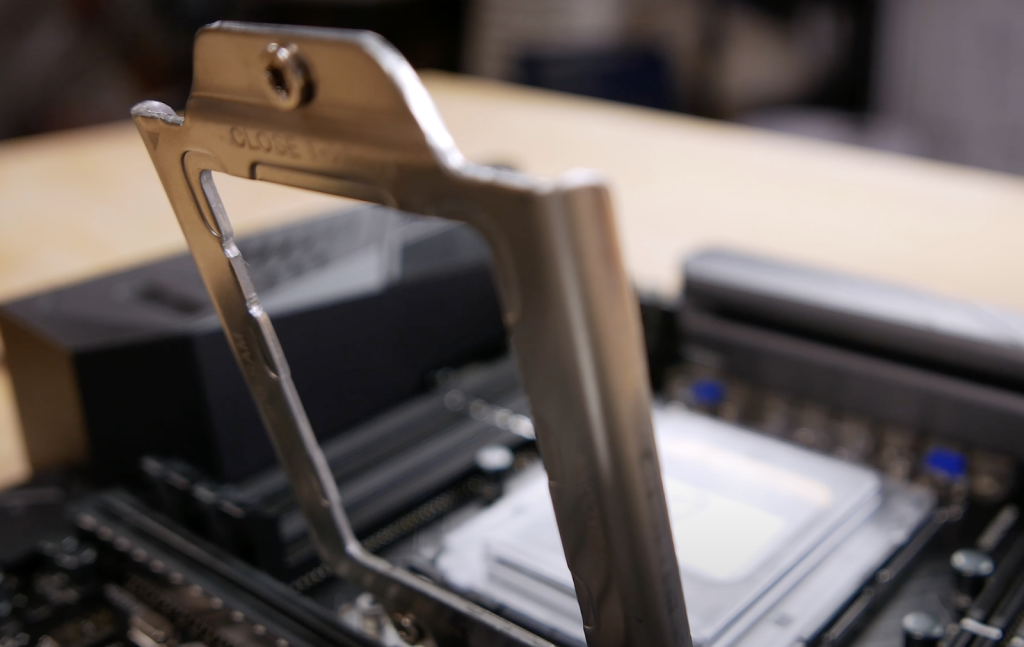
Once you unscrew the screws using the screwdriver, you will see the lid popping out for you. The lid is spring-loaded, and you must handle it with care. The lid leads to the bracket that you can seamlessly push out.
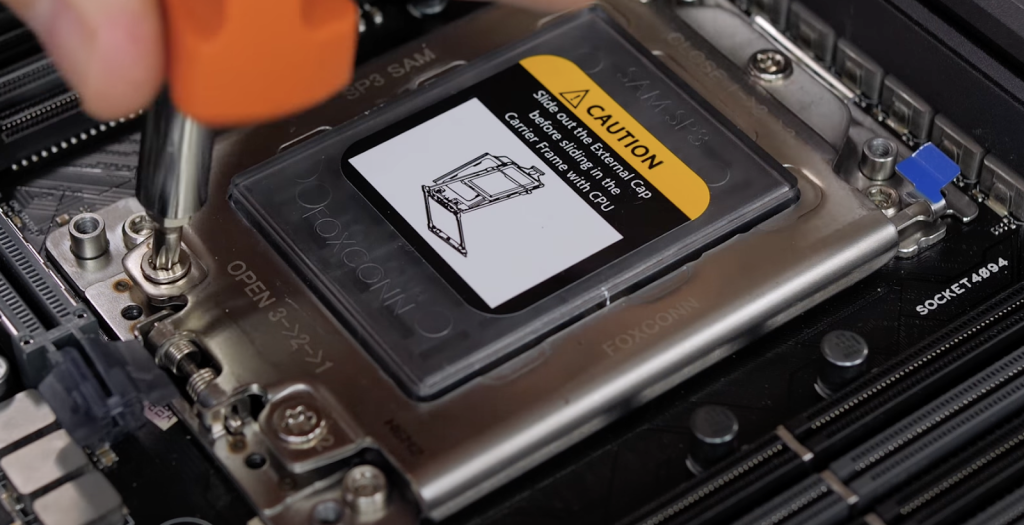
It is important to loosen the mentioned screws in the given order to ensure that the bracket reveals itself. You can use the Trox screwdriver for the same.
Step 3: Take Care of Plastic Tray
Underneath the bracket, you will find a plastic tray. You can remove the same in the following way:
- You can lift the tray by first loosening the screws and then pulling the tabs, mostly in blue.
- Once the tray is up, you will see the pins.
- You can remove the plastic tray by sliding out the bracket or the carrier frame.
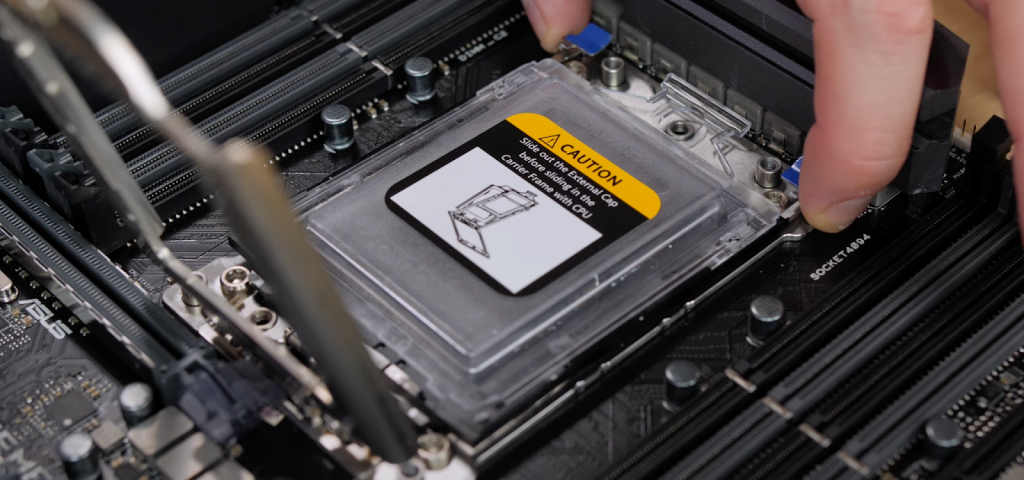
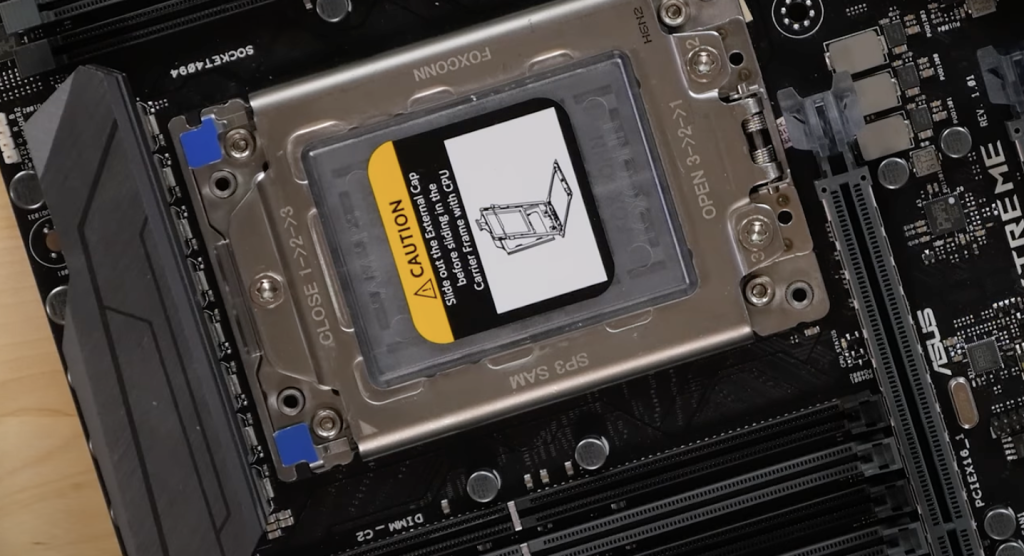
Once done, you will find a removable socket cover. However, we will not remove it right away. (The part with Foxconn written on it).
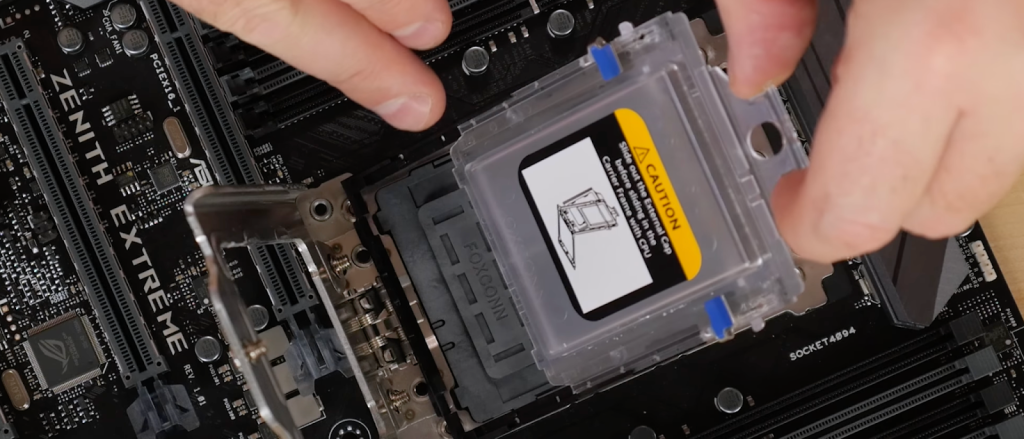
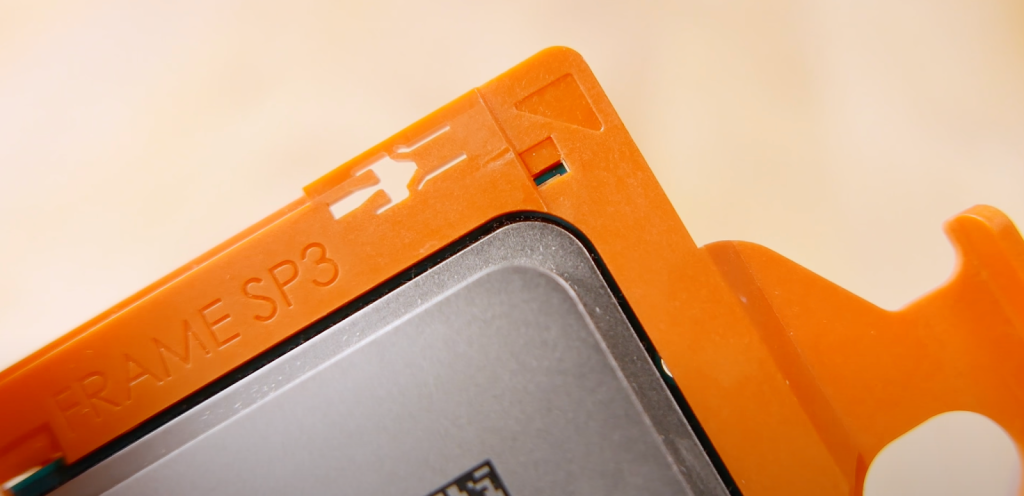
Step 4: Fit in the CPU
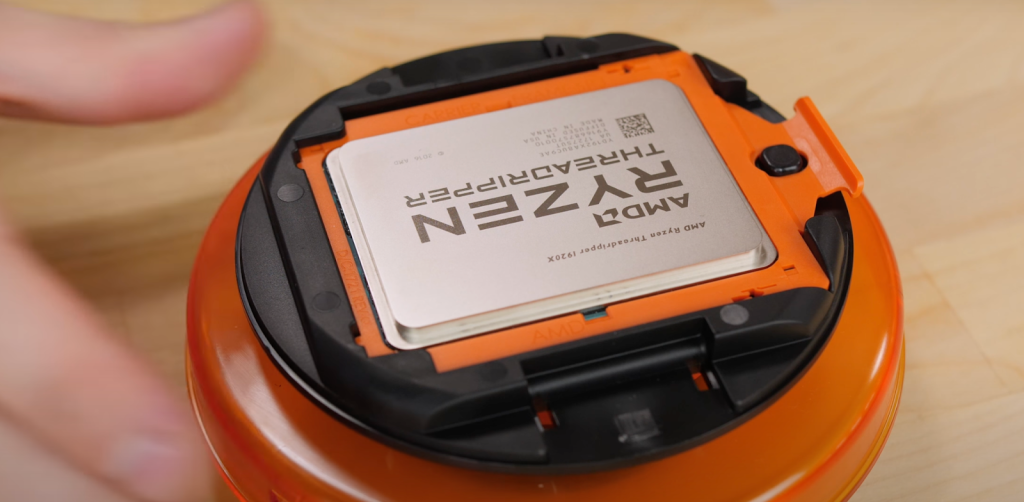
Follow the arrow on the CPU package and also the carrier frame to slowly slide the package into the second lid. As the orange packaging has an arrow, we didn’t initially remove it while unboxing the processor. It is necessary to avoid misalignment.
Step 5: Remove the Socket Cover
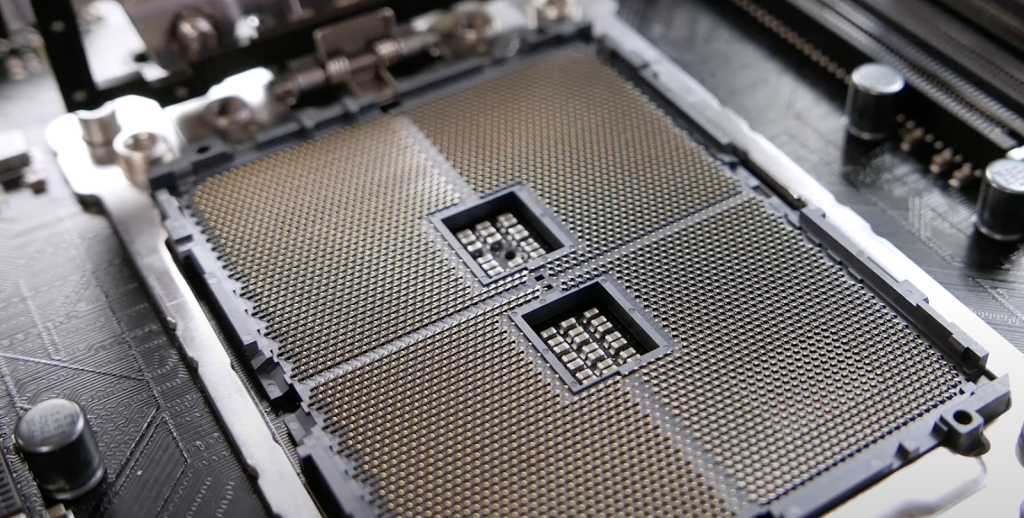
The plastic piece, followed by the socket cover, protects the pins on the socket and makes place for the incoming CPU.
Once the CPU is in place, you can remove the socket cover, exposing the pins. At this time, you can simply snap in the CPU and wait to hear a click sound.
Step 6: Close the Lids
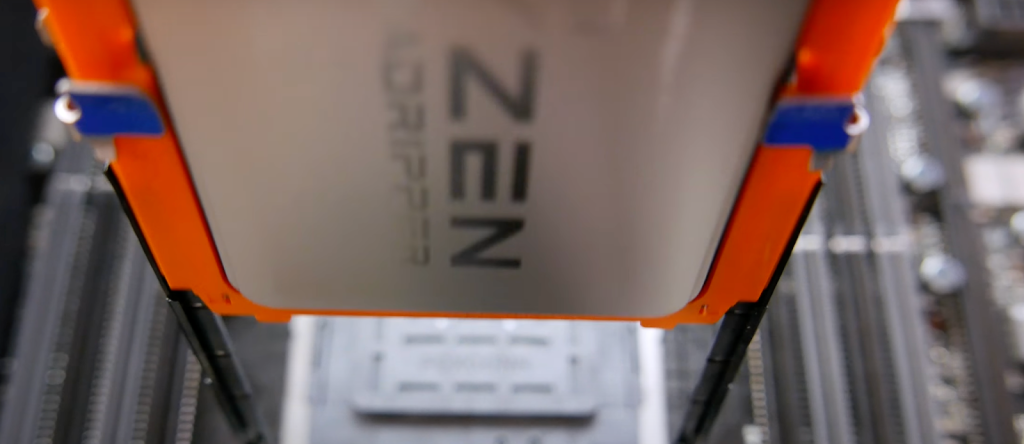
Once you hear the CPU snap into place, it means that you have closed the lid. Now, you simply need to push the lid down and start tightening the screws.
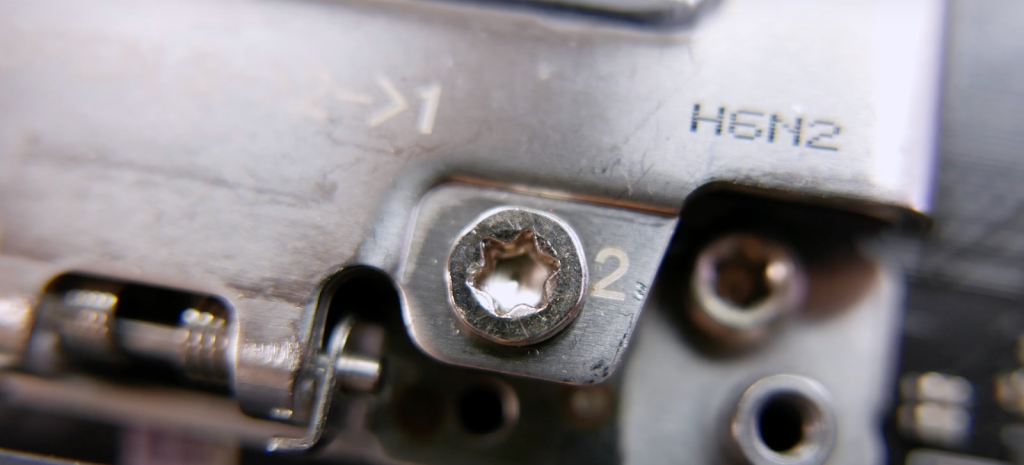
Step 7: Screw and Tighten
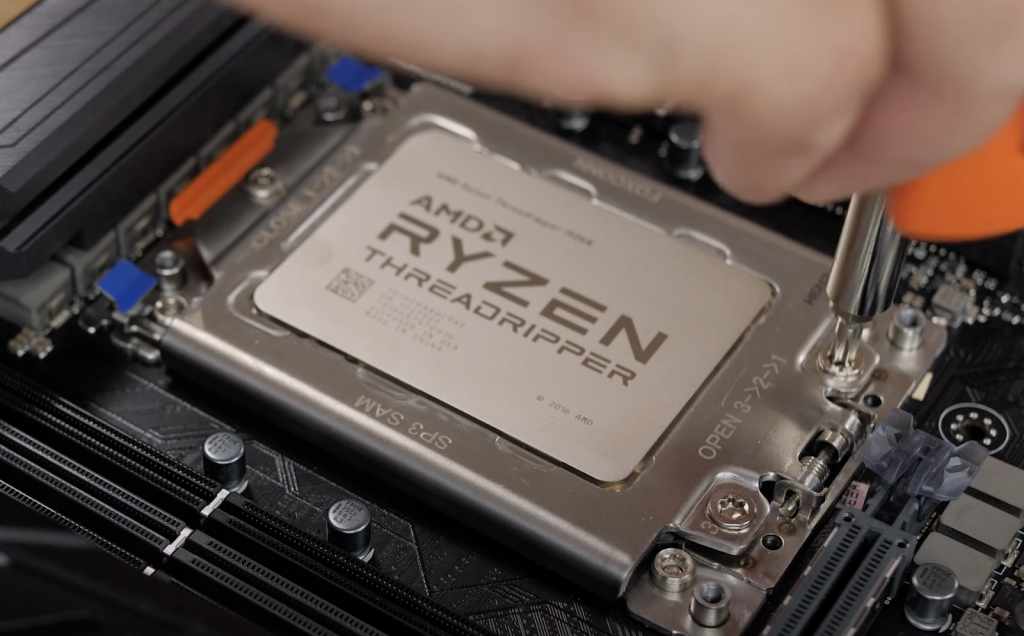
Do note that you should tighten the screws in the order mentioned. If the opening order was 3-2-1, then the closing order would be in reverse or 1-2-3. And that would help you build a Threadripper system without any hassle.
What To Do After CPU Installation?
Now that you have installed the computer processor, you can start by testing the same. Here are the points to follow:
- Run a visual check to identify pins bent out of shape, deformed pads, or other hardware issues, if any.
- Plug the power supply and see if all is well or not.
- Initiate a system startup. If the system lags or fails to load, there might be an issue with installation.
- You can even head over to the BIOS and see if every configuration is showing up as desired, including the correct RAM amount and the latest firmware details. You might have to update the BIOS if needed.
Once done, you can continue working on the setup by first applying thermal paste to improve the overall thermal conductivity. Note that the paste makes the motherboard-adhering heat sink more functional. However, once the paste is all set, you might want to see if the heat sink is properly secured via the brackets.
And finally, if you have a cooler instead of the heatsink, consider connecting the motherboard to the fan header. This helps automate the fan, depending on the processor’s temperature. Also, fit in the required portions of RAM on the slotted zones on the concerned motherboard.
Last but not least, check every peripheral and see if the likes of the keyboard and mouse are working properly or not.
Frequently asked questions
Yes, it is technical but an easy process. You simply need to accurately place the CPU socket on the motherboard, align the pins and contact holes/ pads as per the alignment, fit in sinks and coolers based on needs, and use an anti-static band. For detailed insights on each, refer to our article.
If a normal-sized motherboard socket has the pins and the processor has the holes or slots, you can infer that the CPU is from Intel, following the LGA configuration. If the position of pins and contact holes are reversed, we have a standard AMD processor in our hands.
In most cases, upgrading a CPU would require you to even upgrade the motherboard. This is due to the fixed nature of the CPU sockets.
If you see the pins and contacts in perfect alignment, the CPU is expected to be compatible with the motherboard. You can even cross-reference the model and manufacturer name of the motherboard with the processor using specific product compatibility tools.
No, in most cases, you need not reinstall much if you are simply upgrading the CPU. However, for RAM and even storage inclusions, OS upgradation might also be required.
Even though it is not advisable to straighten the bent pins, you might consider using a needle and gently pushing the pins into the shape or in the right direction. Socket pins might have to be replaced, as changing the entire motherboard can get troublesome.
Checking for a BIOS update is easy. Simply hit the Windows Key and the “R” tab to open up the “RUN” command line prompt. Type in “MSINFO32,” and you will see the details. Or, if you are on Windows 10, go to the “System Information” section and check everything as part of the system summary. Also, check the latest BIOS version on the motherboard’s website, match it with the current version, and download/install the latest version if needed.
Some motherboards might turn on even without a CPU installed. You can check the same by connecting the device to the power supply and checking if the LEDs on the motherboard start or not. You might even hear beep sounds, showing that the motherboard is functional.
Conclusion
As seen, locating a CPU socket on the motherboard and going ahead with the Intel or AMD installation isn’t all that hard. All you need is some attention and a detailed read-through of this article.
Plus, it is always better to learn about every kind of Intel and AMD processor lineup there is to locate the right CPU based on your requirements.
And while this article answers questions like how to place the CPU on the motherboard or how to know if the CPU is installed correctly or not, learning about the CPU lineups and every other motherboard component will require you to stick around on this website longer.
Leave a Reply