
With the PC gaming market seeing a rise after the pandemic, it’s becoming more demanding and expensive, day by day. If you’re looking to build your own gaming rig yet have no idea of how to proceed, you’re in the right place.
This article has everything you’d want to know, including:
- Parts needed to build a gaming PC
- How to select the right parts
- Getting the system ready in action
- Pre-built and Post-build tests
- And answers to commonly asked questions
Having built over 15 gaming PCs till date, I can better relate to the rigors, pain points, and key hacks to get the system up and running. That said, whether you’re a beginner or an intermediate, you’ll be able to build the gaming computer of your dream. Keep reading!
Contents
- Parts Needed To Build a Gaming PC
- Selecting The Right Parts
- How To Build a Gaming PC?
- The Final Test
- How Much Does it Cost to Build a Gaming PC?
- How Long Does it Take to Build a Gaming PC?
- Frequently asked questions
- Conclusion
Parts Needed To Build a Gaming PC
Let’s start with a table first, enlisting the primary, secondary, and even tertiary PC components needed for gaming configuration:
| Parts | Utility | Price Range | Examples |
|---|---|---|---|
| CPU | Brain of the machine | $300-$600 | Ryzen 7 5800X from AMD |
| Motherboard | Primary and interoperable circuit board | $100-$400 | ASUS ROG Strix B550-F |
| GPU | Chief graphics and image rendering component | $500-$1500 | GeForce GTX 3080 from NVIDIA |
| RAM | Temporary memory for the CPU | $70-$300 | Corsair Vengeance RGB Pro DDR4 32GB |
| Storage | Stores files, apps, and even the OS | $50-$300 | Samsung 970 EVO Plus NVMe SSD 1 TB |
| Power Supply | Provides power to all components | $70-$200 | EVGA Supernova 750W G5 |
| Case | Enclosure for protecting PC components | $50-$200 | NZXT H510i Compact ATX Mid-tower |
| CPU Cooler | Prevents overheating | $30-$100 | Noctua NH-D15 |
| Case Fans | Helps with circulation | $10-$30 | Arctic P12 PWM PST or Pure Wings 2 |
| Screwdrivers | Helps secure screws relevant to other components | $10-$20 | Philips and Flathead |
| Thermal paste | Helps facilitate heat transfer between CPU and cooler | $10-$20 | Arctic MX-4 |
| Cable ties | Helps with cable management | NA | NA |
| Monitor | Works as the display screen | $200-$1000 | Dell Alienware AW3418DW |
| Keyboard | Essential input device | $50-$200 | Corsair K95 RGB Platinum XT |
| Mouse | Meant for gaming precision and speed | $30-$100 | Razer DeathAdder Elite |
| Headset | Meant for in-game communication | $50-$300 | SteelSeries Arctis 7 |
| Speaker | Offers high-quality audio | $50-$500 | Razer Nommo Pro or Logitech G560 |
| Gamepad | Useful for better in-game control | $30-$200 | Xbox Elite Wireless Series 2 |
Now that I have sorted a basic component list for you, let us learn more about selecting the same.
Selecting The Right Parts
Now that you know all the parts required, read on to learn how to pick them for the best possible performance and value.
1. Decide Budget and Purpose
It goes without saying that you need to zero in on the budget before trying to purchase the gaming PC components. But the question is, how do you plan the budget in the first place? And the answer lies in your “Purpose” of building a custom gaming PC.
For instance, if you want to play Open World games like GTA V or even Assasin’s Creed Valhalla, your focus should be on getting a powerful GPU and a sizable RAM module. Now, once you have the gaming genre sorted, you can identify yourself as a beginner, intermediate, or even an expert, for preparing a budget.
2. Perform a Compatibility Check
This is one of the more underrated parameters to consider when building a PC. It also happens to be the reason why you should always zero in on the CPU first.
As a gamer, you first need to prepare the list of components that you would need to build a certain type of PC.
For the CPU, the specs need to focus on the core count and clock speed. And once you finalize the CPU you want, it is advisable to check if the motherboard you are planning is compatible or not. Learn more in the CPU buying guide.
As mentioned, the motherboard is the circuit board that connects every other component. Therefore, you need to see if it has the LGA, PGA, or even the Threadripper sockets — as a compatibility check for the CPU of choice.
Pro Tip: You can use the PC builder to choose the optimal PC parts and ensure they’re compatible or not.
3. Selection, Per the Game Type
Here comes the fun part. If you plan on assembling a PC solely for gaming, you are most likely to play MOBA, Open World, FPS, Racing, and even MMORPG games.
And while the broader overview remains the same, there are a few granular differences between the experiences offered by each game. That’s why if you are a Pro gamer, there isn’t a one-size-fits-all build.
Now that you know the basic steps, here are a few strategies to get started, right before starting with the build:
- Focus on preparing a well-lit and well-ventilated workspace.
- Keep all the tools handy, including screwdrivers, thermal paste, cable ties, and more. Label them if required.
- Do a standard check of the components, unbox the same, and label if necessary.
- Take a look at the instruction manual that comes with each component
- Set up an anti-static environment using a compatible mat or a wristband. This would keep ESD damages out of the equation.
- Cross-check each component with the specs sheet that you previously prepared.
- Keep the bootable OS drive handy.
Once you’re done with the part selection, you can go further and install them.
How To Build a Gaming PC?
By now, you should have everything needed to build a gaming rig. Now, I will go over each component-specific PC installation step that might make life easier for you. Keep the tools for building a PC handy and let’s begin with the CPU.
1. CPU Installation
CPU is the brain of your system. It processes game instructions from the HDD/SSD, loads them onto RAM, and sends input to the GPU for rendering.
Check motherboard compatibility with LGA, PGA, or AM4 connectors for Intel and AMD CPUs. Consider TDP and PSU size for compatibility.
Always unpack the component carefully and locate the motherboard socket compatibility before proceeding.
Steps to Install the CPU
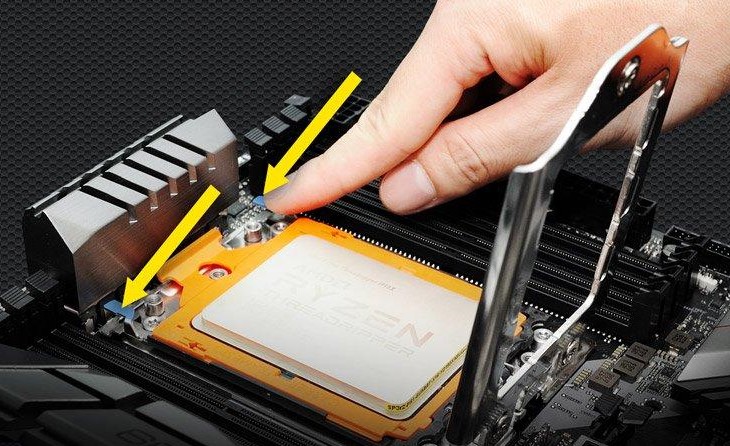
Step 1: Open the socket and simply place the processor inside. Make sure that the placement is as per the notch-specific alignment mark.

Note: Opening the socket can be a time-intensive process. For LGA and PGA versions, you simply need to lift the brackets or arms but for the thread ripper sockets, screwing and unscrewing are necessary.
Step 2: Once you see the CPU sitting inside the socket, lower the level of the arm to secure the processor into place.
Step 3: Apply some thermal paste to increase thermal conductivity.
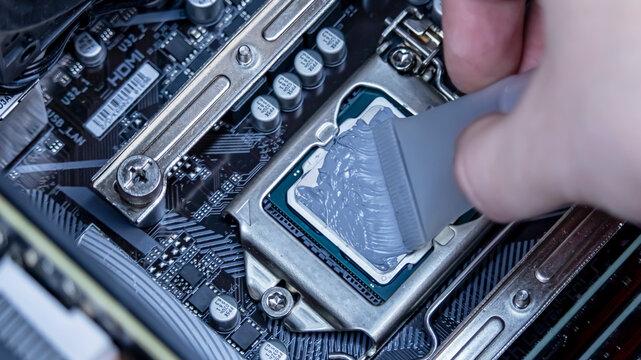
This sum up the CPU installation. Moving further, you can fit in the motherboard and cooler immediately. For more in-depth instructions, you can check out my dedicated guide on installing a CPU.
2. GPU Installation
GPU is quite essential for top-notch graphics rendering. Connect the GPU to the monitor and choose from NVIDIA or AMD GPUs based on budget.
Check GPU TDP compatibility with PSU, and PCIe rating alignment with motherboard socket and CPU PCIe lanes. Consider GeForce GTX 3090 or Radeon RX 6800 XT for graphics needs.
Steps To Install the GPU
Before you move ahead, check if the motherboard has the right PCIe slot.

Step 1: Once done, insert the GPU gently and secure the same using the available locking mechanism.
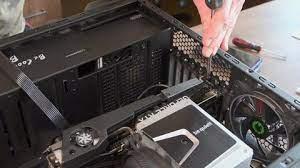
Step 2: Keep the cables handy so that you can plug them into the PSU, once I tell you how to put that part together.
Post the installation, you need to install the drivers for the same, once you go into the BIOS and start setting up the device.
3. CPU Cooler Installation
Coolers are vital for gaming PCs, dissipating heat from intense gameplay. Choose between air and liquid coolers based on budget and needs.
Air coolers are cost-effective with traditional heatsinks, while liquid (AIO) coolers are modern but require space for radiators and coolant. Consider noise levels for a quieter gaming experience.
Steps To Install the CPU Cooler
If you are simply upgrading the PC, remove the existing cooler, clean the CPU surface with isopropyl alcohol, and then attempt the installation.
You can read the instruction manual to see if the cooler you have selected requires additional backplates or brackets.
Step 1: Install the cooler by looking at the CPU socket. Ensure correct mounting and alignment.
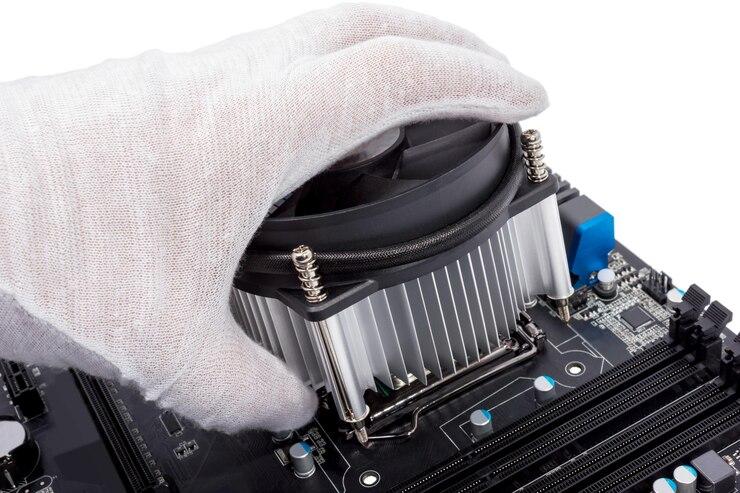
Step 2: Connect the motherboard to the cooler using the necessary cables. You are expected to use the 4-pin Pulse Width Modulation connector — which is useful for helping the cooler’s fan change speeds based on the CPU temperature.
While these are the steps needed to install the cooler, you need to be mindful of a few details.
- More often than not, a cooler connects to the CPU fan header of the motherboard, which in turn feeds off the PSU.
- Yet, some advanced rigs require the coolers to connect directly to the PSUs, via the 4-pin (even 3-pin) Molex connectors.
Coming to examples, you can pick from the Noctura NH-15 air cooler, featuring two 140mm fans, or the NZXT Kraken X63 liquid cooler. However, the latter even involves a 280mm radiator, which might need a bigger case.
4. RAM Installation
Now that the CPU and cooler are taken care of, you must focus on installing the RAM on your new PC. For gaming PCs, prioritize high-speed RAM with ample space. Choose from DDR3, DDR4, or DDR5 variants.
Standard gamers can use G.Skill Ripjaws V Series DDR4 RAM, while advanced users can opt for G. Skill Trident Z5 DDR5-7200MHz with 32GB capacity. Check motherboard slots, memory channels, voltage, and timings for compatibility.
Steps To Install the RAM
Ensure that you turn off the PC, unplug the same, and locate the DIMM slots on the motherboard.
Step 1: Once you have located the RAM slots, push them down to open.

Step 2: Once the slots are open, fit on the RAM module (s), aligning them per the notch. You should not press the RAM modules hard. A gentle push can bring about a clicking sound, which means that the same is successfully secured.
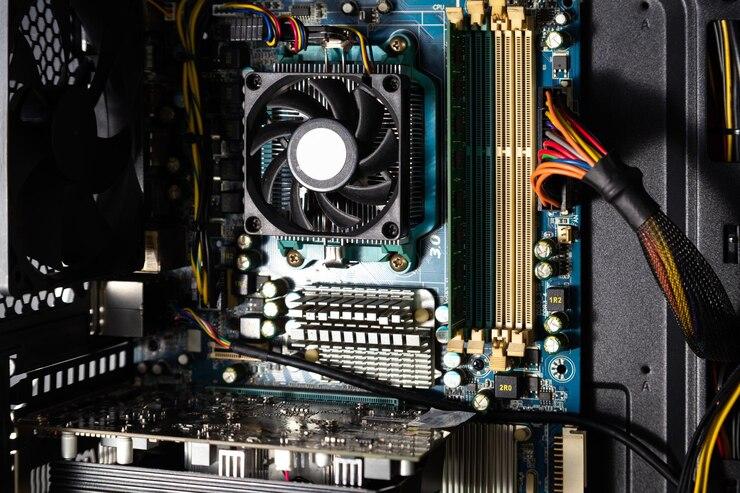
6. Motherboard Installation
The motherboard is crucial for any PC, offering interoperability. Choose from Micro-ATX, Mini-ITX, or ATX based on components.
For Intel CPUs, ASUS ROG Maximum XIII Hero supports overclocking, and for Ryzen, Gigabyte AORUS X570 Master. Check compatibility with CPU socket, GPU PCIe slot, RAM DIMM slots, M.2 slots, PCIe slots, and USB ports.
Steps To Install the Motherboard
The first step towards setting up the motherboard is to install the case standoffs. This lifts the motherboard higher and ensures that there are no short-circuit concerns.
Step 1: Once you’ve the standoffs fit in, align the I/O shield with the rear panel of the case.
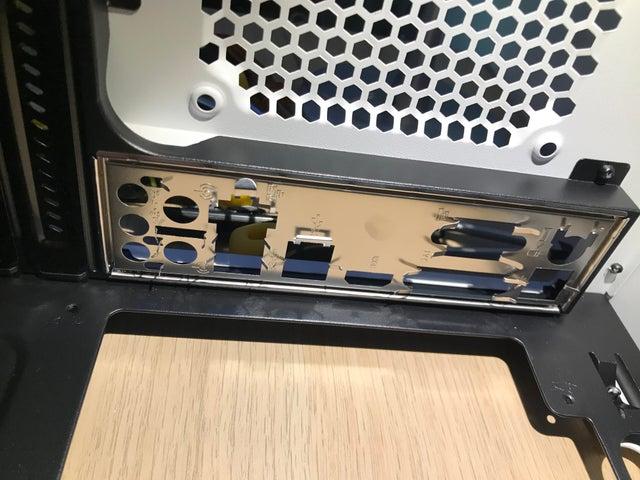
Step 2: Place the motherboard atop the standoffs and tighten the screws.
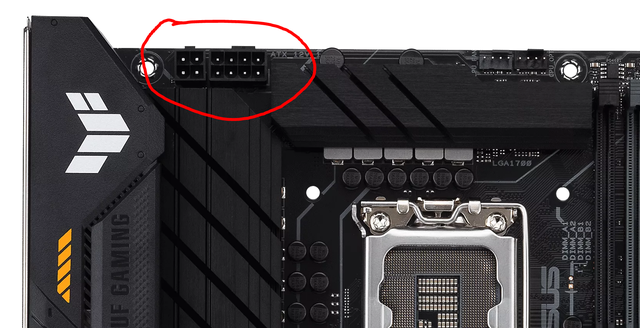
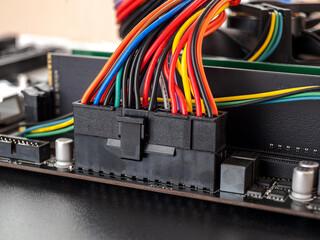
Step 3: Connect the power cables — the 24-PIN ATX connector and even the 4/8-Pin power connector for the CPU.

7. Storage Drive Installation
For game storage on a gaming PC, choose between HDD and SSD based on budget. If affordable, go for an ultra-fast NVMe SSD. Check the motherboard for compatible SATA or M.2 slots before proceeding. Consult the user manual for details.
Steps to Install the Storage Drive
Ascertain your budget and requirements beforehand. Once you know which storage drive to get, proceed with the storage drive installation.
Step 1: Once you locate the storage drive vay, simply fit in the module, per the specifications. While the SSDs will fit in just like that, HDDs will need you to install the drive rails for securing them.
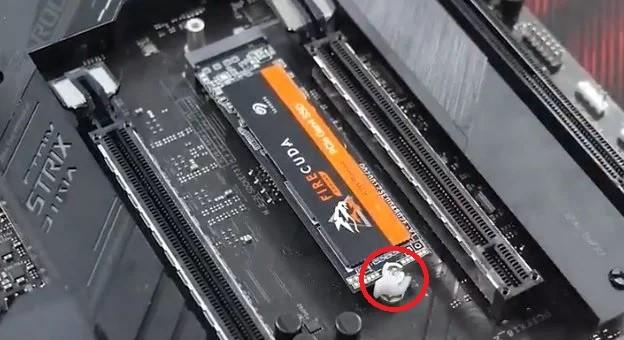
Step 2: Once the drive sits in the storage bay, secure the same by aligning the screw points and then tighten them.
Step 3: The moment you secure the drive on the motherboard, use the relevant cables to establish the connection to the motherboard. This will help take care of the power supply.
Coming to the choices, you can pick NVMe SSDs from the likes of Adata, Kingston, and HDDs from the like of Seagate and Toshiba to take care of the storage requirements.
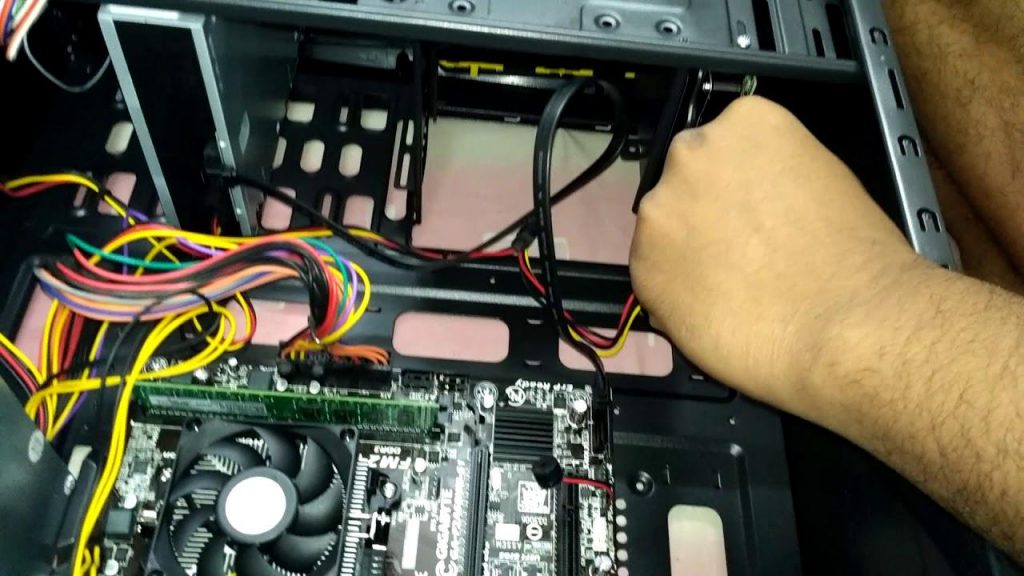
8. Power Supply Installation
PSU supplies power to all components in a gaming PC. Choose modular or non-modular type. The modular has detachable cables for easier management. Check cable compatibility, efficiency rating, and wattage.
Ensure PSU fits in the case along with the cooler and components. Consider Seasonic S12III 650W or Corsair RM750x 750W PSU options.
Steps To Install the PSU
Unplug the PSU, provided you have checked if it is working or not. Once done, you need to locate the mounting area for the PSU.
Step 1: Place the PSU onto the mounting area.
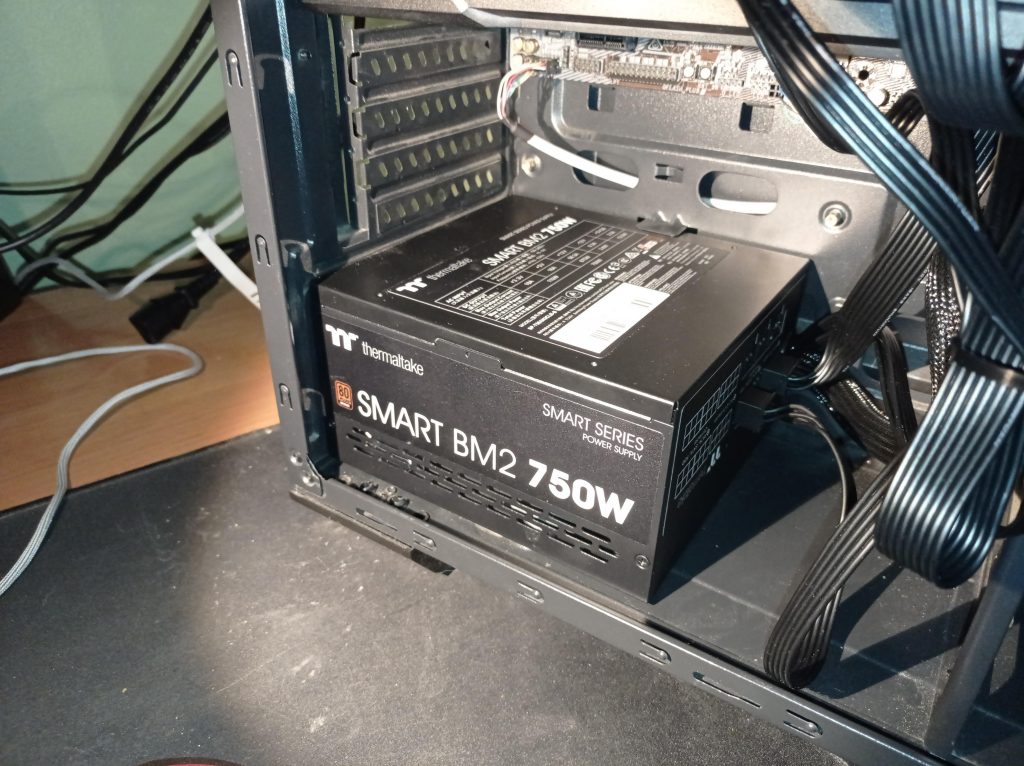
Step 2: Connect all the cables from the motherboard and fire up that PSU.
Step 3: Consider managing the cables better, using zip ties, clips, and sleeves. Once you’re done installing the power supply, you can go ahead with the pre-built test.
Pre-built Test of a Gaming PC
By now, you can expect to have most PC parts ready, albeit individually. I expect you to have the motherboard lying outside the case with the parts connected (provided you haven’t installed it inside the case using standoffs).
Therefore, before you seal that PC case for good, let us initiate a pre-built test. This test is necessary as it would allow you to identify the state your PC components are in.
As part of the pre-built test, you end up checking the if every component you have assembled towards building your gaming PC is working at full potential or not.
To initiate the test, simply plug in all the components to the motherboard, which then needs to connect to the PSU. In some cases, you need to connect the GPU directly to the PSU as it might have higher power requirements.
Steps for Pre-built Build Test:
- Connect even the peripherals to the PC components, including the mouse, keyboard, and even the monitor to see if they are working properly or not.
- Power on the PC and head over to the BIOS/UEFI setup to see if your gaming PC is detecting every component or not. If it is, you have installed them right.
- If you plan on installing a CPU cooler as well try connecting it to the motherboard (or the PSU if it seeks more power) and see if it is turning on or not.
- Check if all the LED lights are turning on or not. This test helps detect any form of hardware failure before you put the PC case together.
- A good way to test the quality and working state of the GPU is by using a benchmarking resource like the 3DMark, directly from a bootable drive.
If there aren’t any error messages displayed during the boot-up process, all the components seem to be in the right state. However, if you see the BIOS not detecting any component, you can uninstall and install the same again, connect it individually to the motherboard and the PSU, and keep checking. However, if the issues persist, there are the troubleshooting steps to follow:
Troubleshooting Steps:
- Check every connection there is, at least twice.
- Check if the power source is working as desired
- Check the RAM module, processor, GPU, storage drive, and even the storage drive individually, keeping each connected to the motherboard.
- You can even run specific hardware diagnostic and stress-testing tools like MemTest86, CPU-Z, and more from a bootable drive to check the working state of all the mentioned components.
9. CPU Case Installation
After a successful pre-built test, assemble PC components inside a case —an enclosure where PC magic happens. Choose from cube, SFF, mini-ITX, mid-tower, full-tower, or open-air cases.
Check compatibility for CPU, RAM, cooling, and motherboard space. Look for drive bays and expansion slots. Consider feature pack Cooler Master MasterCase H500M or Corsair Carbide Series 275R cases for a better build.
Steps To Install the CPU Case
Locate the right case and get the same to your well-ventilated working space. Once done, follow the steps:
Step 1: Remove the sides by loosening the screws.
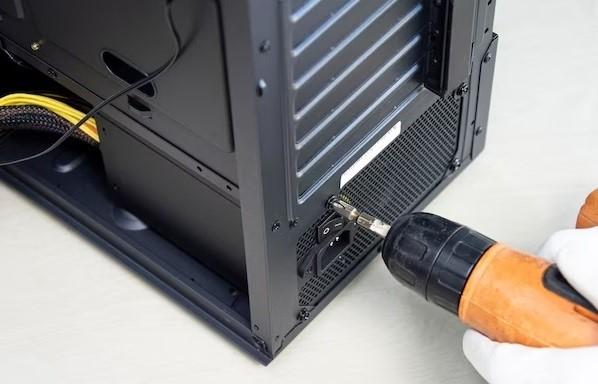
Step 2: As you would recall, the motherboard installation would requite standoffs.
Step 3: Make space and install the power supply, as mentioned in the PSU section.
Step 4: Install the storag drive, optical drive, and other components that require the drive bays on the PC case.
Step 5: Once the entire assembly is ready, install the standoffs and place the already prepped motherboard on it.Make sure the alignment matches the case holes.
Step 6: Attach the cables to the PSU and follow the same by making space for the cooler.
Step 7: Add in the USB ports, audio jacks, and other front-panel connectors
Once everything is done, secure the side panels using fasteners or screwdrivers.
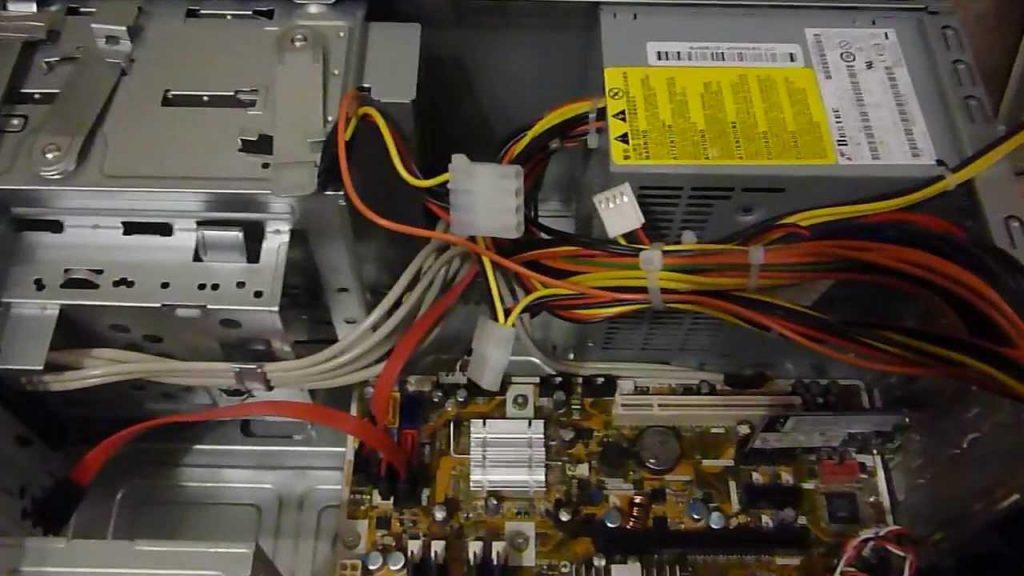
10. Cable Management
Your gaming PC needs to have good cable management. The reason for this is to maintain proper airflow and prevent overheating. It even can help improve the aesthetics of the device. If you are not convinced, try out the strategy whilst using a computer case having a transparent side panel.
Here are some of the other reasons to have a good cable management strategy:
- Getting rid of the unsightly cables and preventing clutter.
- Making troubleshooting easier
Now that you know cable management is necessary, here are the tips to put a good strategy together:
- Plan it before you start assembling the PC. This will help you think ahead and plan the aesthetics, accordingly.
- Keep the velcro straps, zip ties, and even cable combs handy to manage the cable spread better.
- Route cables using cable grommets. This approach might help you feed the cables through the front of the case.
- Do not allow the cables to slack and try to keep them taut. This would help improve the overall airflow.
- Avoid non-modular PSUs with fixed cables. Modular picks can help you fit in the cables and manage the entire stack better.
- Always use extensions and custom-length power or data cables for a cleaner look.
Post-Built Test
Now that you have assembled most of the gaming PC and even spared some thought for cable management, it is time to focus on the post-built test. This test will help you check the state of components and the entire PC in general, post-assembly.
Checklist for Post-Built Test:
- Start the PC and see if the fans and lights are working all fine or not.
- Head over to the BIOS again and make sure that the PC detects every component that you have assembled.
- Use the benchmarking, hardware diagnostic, and stress-testing tools once again to ensure that there are no lingering errors.
- Finally, check all the motherboard orifices to ensure that even the USB ports, audio jacks, Thunderbolt slots, and more are working as desired.
Ideally, there won’t be any issue as you already have taken care of the pre-built test. In case there are any issues, here is what you can expect:
- Power on the PC and see if it boots. If it doesn’t, head over to the BIOS and check the settings and the configuration requirements.
- Try and install the OS to see if the issues persist or not.
11. Operating System Installation
The operating system is arguably the most crucial part of putting a gaming PC together. It is necessary to establish a connection between the user (you) and the components in play.
Plus, the OS helps the gamer in you access the games and other relevant application software modules, provided you install them once the operating system is all set up.
Coming to the options, check out different operating systems for PC. Compatibility-wise, you need to see if the OS in play supports the game(s) you want to try out. You also need to check the compatibility with the CPU, GPU, and even the storage module before proceeding.
Steps To Install the OS
Obtain a physical OS copy or even a USB-specific digital print to install. This will help create an installation media.

Step 1: Connect the drive (USB, DVD, or otherwise) to the PC.
Step 2: Restart the device, head over to the boot menu, and select the drive you want the PC to boot from.
Step 3: Once done, simply follow the installation prompts. Enter the product key when asked for it.
Step 4: Once installed, plan for the drivers, storage partitioning, and other tasks, depending on your preferences.
Even after installing the OS, you need to download and install the required drivers (graphics, Bluetooth, networking, etc) by heading over to the manufacturer’s website.
The Final Test
The final step is to initiate the final test. This step is to ensure that the components, OS, and the overall system is staying stable or not, post the build.
Here are the final testing and troubleshooting steps:
- Check the PC connections, all over again.
- Power on and see if the LEDs for each device light up or not.
- Head over to the BIOS again, run diagnostic tests, and even use the in-diagnostic feature of the installed OS to verify.
- Plug in every peripheral and see if they are working fine or not. The functioning of the keyboard and mouse become all the more important if you plan on setting up a gaming PC.
- Test the PC performance again and manage the cables if you see the case heating up.
In case you see any issue with the BIOS, boot-up, or hardware, follow the installation steps associated with each component carefully, try running a game at full resolution, and check the drivers all over again.
And that sums up our PC building gig, step-by-step.
How Much Does it Cost to Build a Gaming PC?
The cost of building a gaming PC depends on the availability of components, the purpose of the PC, and even the quality of the components you plan on getting. If you plan on building a basic gaming rig, anything between $500 to $700 can suffice.
However, if you plan to go high-end, you might even have to set aside $2000, especially if you plan on getting the likes of RTX 3090 or an 11 Gen Intel Core i7/i9 processor for your PC.
Lastly, the choice of PC peripherals, like the keyboard, mouse, gamepad, and more can also push the prices higher by at least $200 to $700.
How Long Does it Take to Build a Gaming PC?
Building a gaming PC might take a first-time builder close to 6 or even 8 hours. However, if you follow this guide to the T, you can reduce the PC building time by almost 50%.
Also, if you compare the time taken to build a gaming PC with the time taken to build a normal PC, there is a standard difference of at least 1 to 2 hours.
The reason here is that for assembling a gaming PC, you need to install a GPU, manage the GPU-specific cables, and even get a bigger cooler in place. All of that can push the time-based figures higher than usual.
Frequently asked questions
Once you have built a gaming PC, you need to install the OS and the relevant drivers. Once done, you might even need to update the software, install the right games and apps that you have always desired, set up the peripherals like mouse and keyboard, and finally optimize PC settings based on how the games and apps perform.
Not exactly. Yes, building a gaming PC might sound extremely technical due to the inclusion of several components. However, once you know how each component — SSD, CPU, RAM module, GPU, cooler, and more — works, it becomes easier to envision the final build. But you should know your way around screws and cables to get better at PC building.
Yes, it is always cheaper to build your own gaming PC. And there are many reasons for it. Firstly, you can choose the type of components depending on your purpose. For instance, if you get a prebuilt gaming PC, you might have to pay more and settle for an audio setup you might not even need. In case you plan a custom build, you can cut out that cost and instead focus on getting a better piece of RAM or GPU.
A custom-built gaming PC, loaded with the right cooler, a future-proof GPU like the RTX 3090, a powerful processor like the Intel Core i9, and 16GB to 32GB of RAM can easily be a handful for the next three to five years. On average, you can expect a gaming PC to last anywhere between 2 years to 5 years.
Conclusion
Overall, assembling a gaming PC can turn into an exciting experience, provided you keep your component research game on point. Even though the process might feel a bit daunting initially, practice helps you get better at building a gaming PC.
Yet, you should keep researching and reading aggressively as PC hardware is evolving at a clip and there are always newer components to use— CPUs, RAM units, GPUs, and more — and help build better and bigger gaming rigs.
Leave a Reply