Building a PC is exciting, but it can turn out to be a chore when it comes to installing an OS. Hence, in this article, I’ll explain everything from requirements for different operating systems to installation steps (with pictures).
Contents
Things You Need [Prerequisites]
Ensure that you have access to these three things as listed below:
- Operating System File: This ISO file creates an installation media for the specific OS you want to install on your new PC.
- A Blank USB Flash Drive: This USB drive holds the ISO file. It should have at least 8GB of free storage.
- A Secondary PC/Laptop: You need access to another computer to create a bootable USB flash drive. New to this? Follow the steps here.
How To Install an OS on a New PC?
For most operating systems, this process generally consists of two steps:
- Accessing the BIOS/UEFI menu & Changing the boot sequence
- Accessing the installation page and finishing the setup
Let’s get into the details:
1. Enter the UEFI/BIOS Menu & Change the Boot Order
The first step of operating system installation from the bootable USB drive includes changing the boot order, sequence, or priority from the UEFI/BIOS menu. By changing the order, you can specify the sequence in which storage devices attached to your PC are checked for an operating system.
Step 1: Connect the bootable USB flash drive to your PC and Start your PC. Then, press the Delete key repeatedly to access the UEFI/BIOS menu.
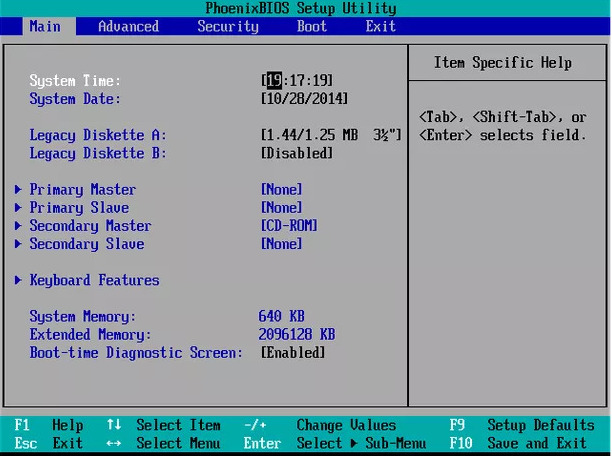
Note: If your motherboard offers a modern UEFI interface, you may skip Steps 2 and 3 as you will need to use the mouse to left-click and drag the USB flash drive at the top of the Boot Priority list to change the boot order.
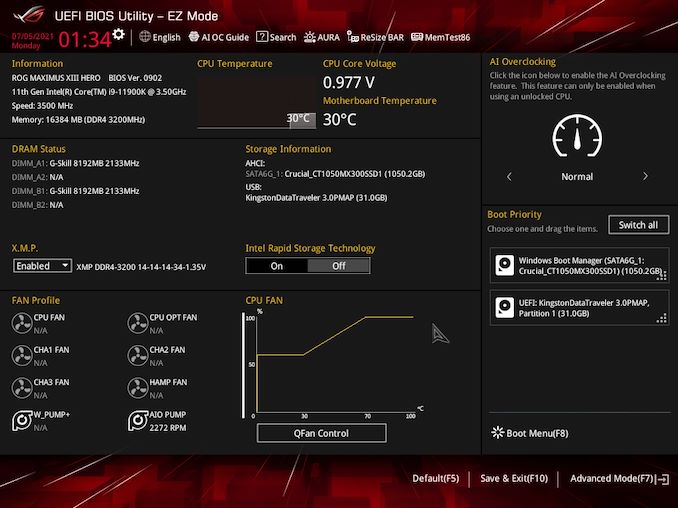
Step 2: When the UEFI/BOIS menu opens, use the left and right arrow keys and navigate to the Boot tab.
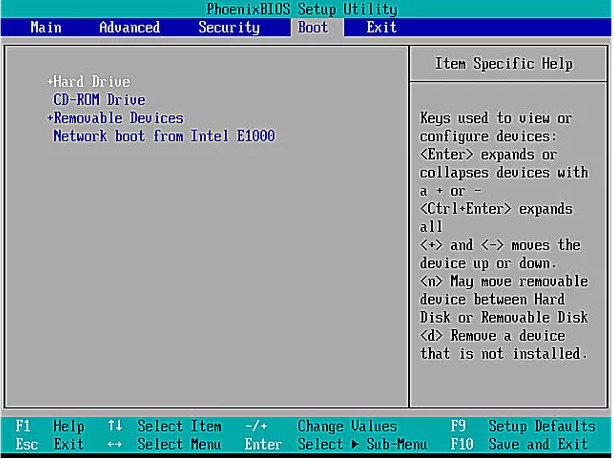
Step 3: Under the Boot tab, press the plus or minus keys to change the boot order to Removable Devices, i.e. the bootable USB flash drive connected to the PC.
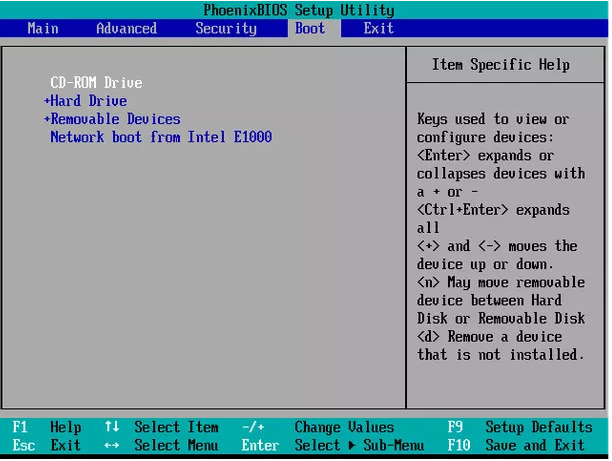
Step 4: Press F10 to save the changes and exit the BIOS/UEFI menu once you change the Boot order.
After you change the boot order, restart the computer to boot from the USB flash drive. When the PC starts, you will reach the installation page.
2. Complete the Operating System Setup Process
When you reach the OS installation page, you will need to complete the setup process as detailed in the steps listed below.
Note: The steps for installing a particular OS may vary slightly from one to another. The steps listed below should help you install Windows 11.
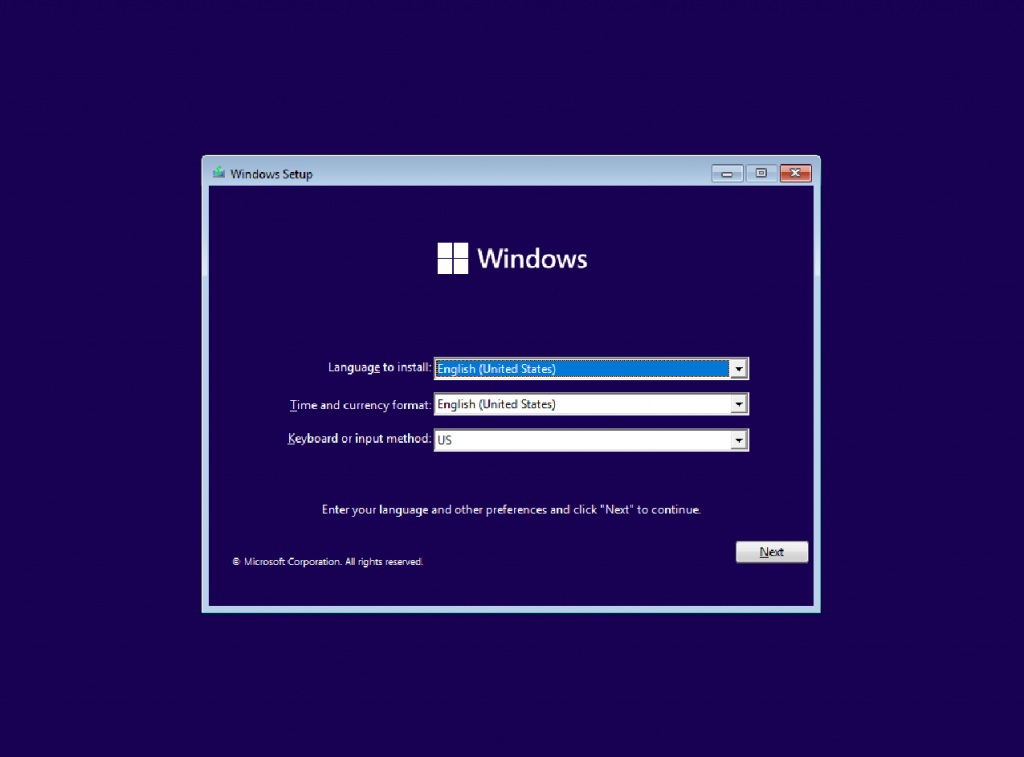
Step 1: Select the Language to install, Time, and currency formats, followed by Keyboard and input method by clicking their respective drop-downs. Then, click Next.
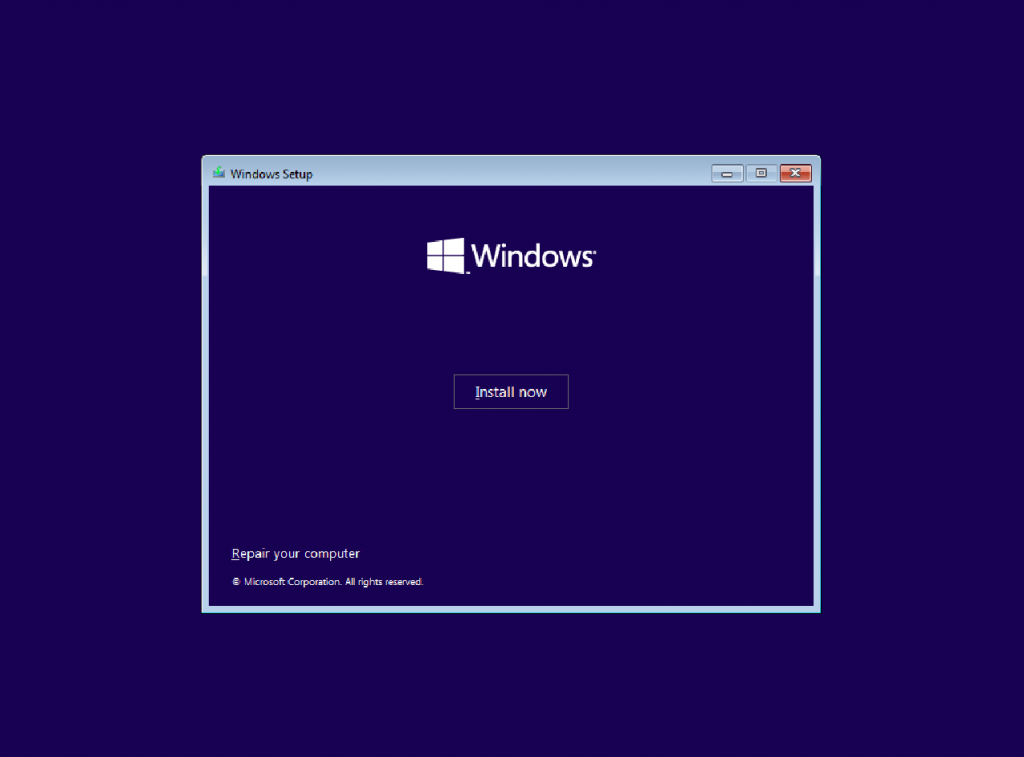
Step 2: Click on Install Now.
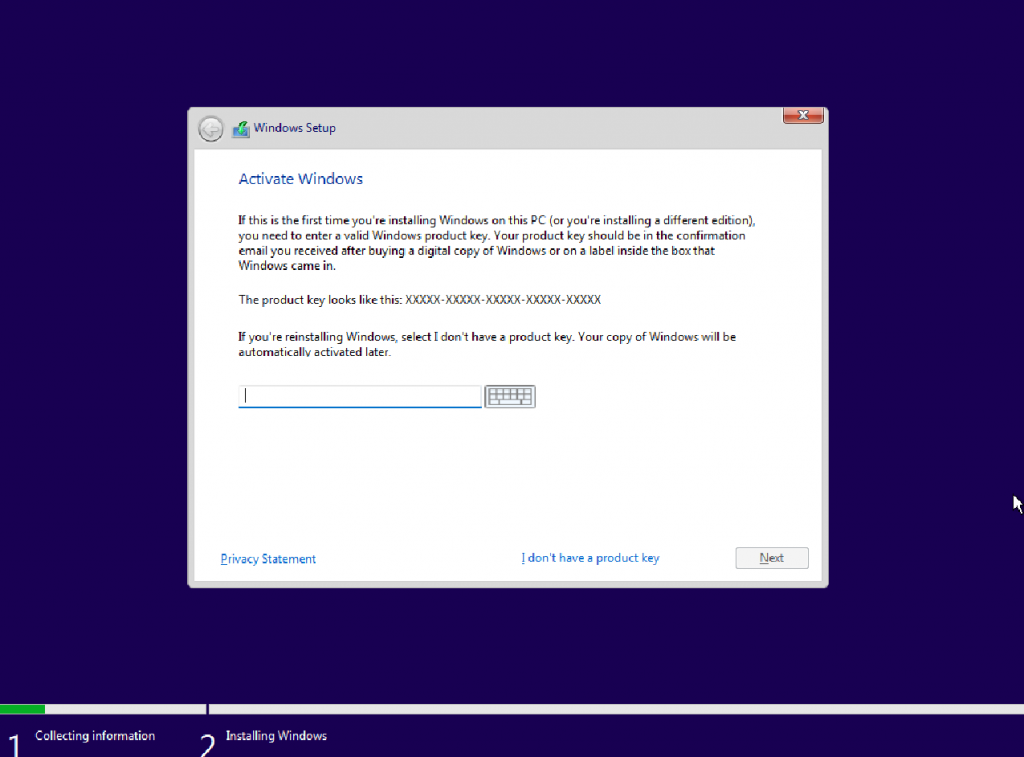
Step 3: Type in the Product Key to Activate Windows. If you don’t have one, select ‘I don’t have a product key’ and click Next. You can activate Windows later on.
Step 4: Select the edition of Windows 11 you want to install and click Next.
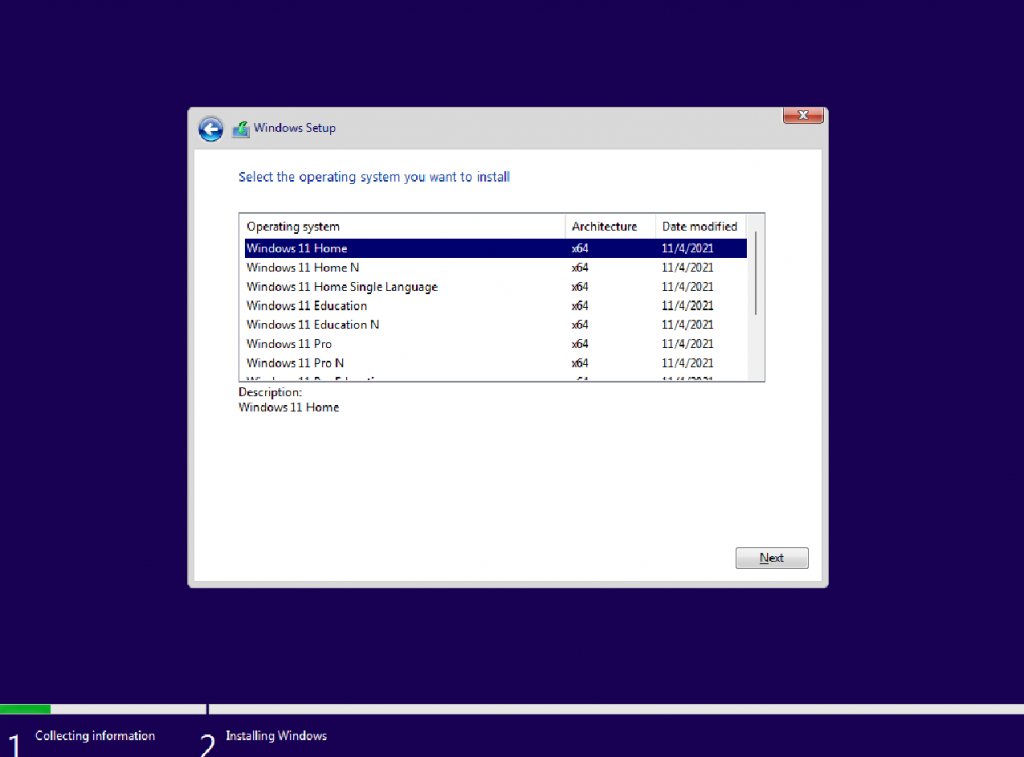
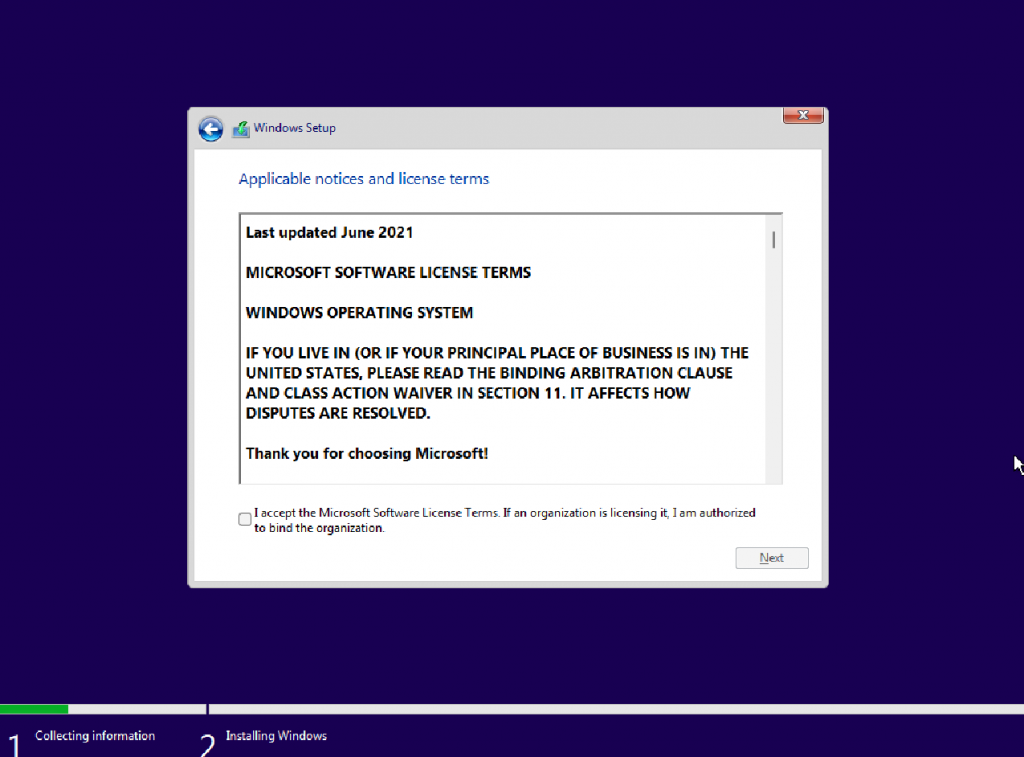
Step 5: Click the checkbox to Accept the license agreement. Then, click on Next.
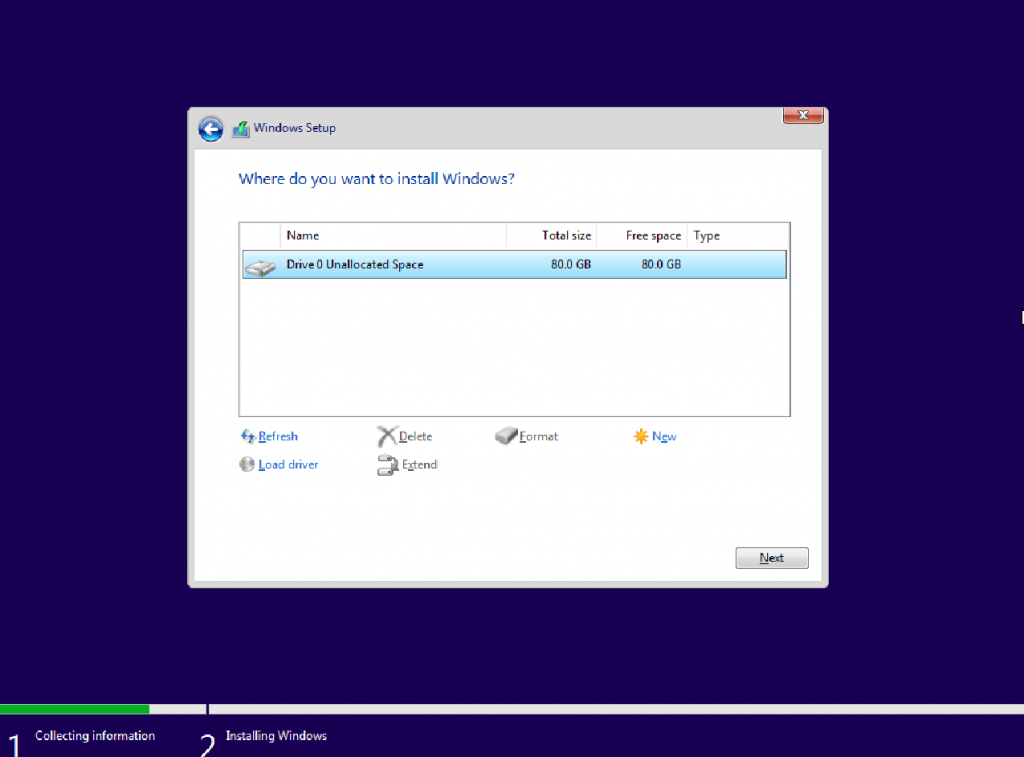
Step 6: Select the drive on which you want to install the operating system on. Then, click the New option to create a disk partition if you want to create one.
You may skip to Step 9 if you want to create a disk partition later on using the Disk Management utility in Windows.
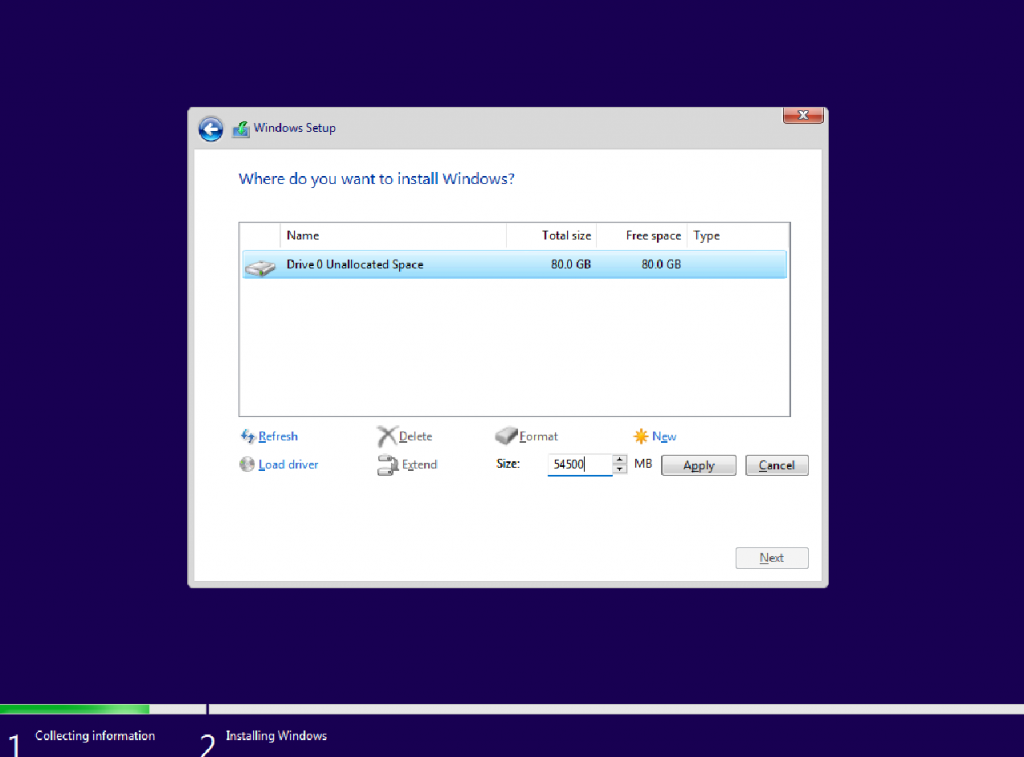
Step 7: Type in the capacity in MBs for the new disk partition and click Apply. Then, click on OK when an additional prompt appears on the screen.
Step 8: Once the disk partition is created, select the Primary partition from the list of drives and click Next.
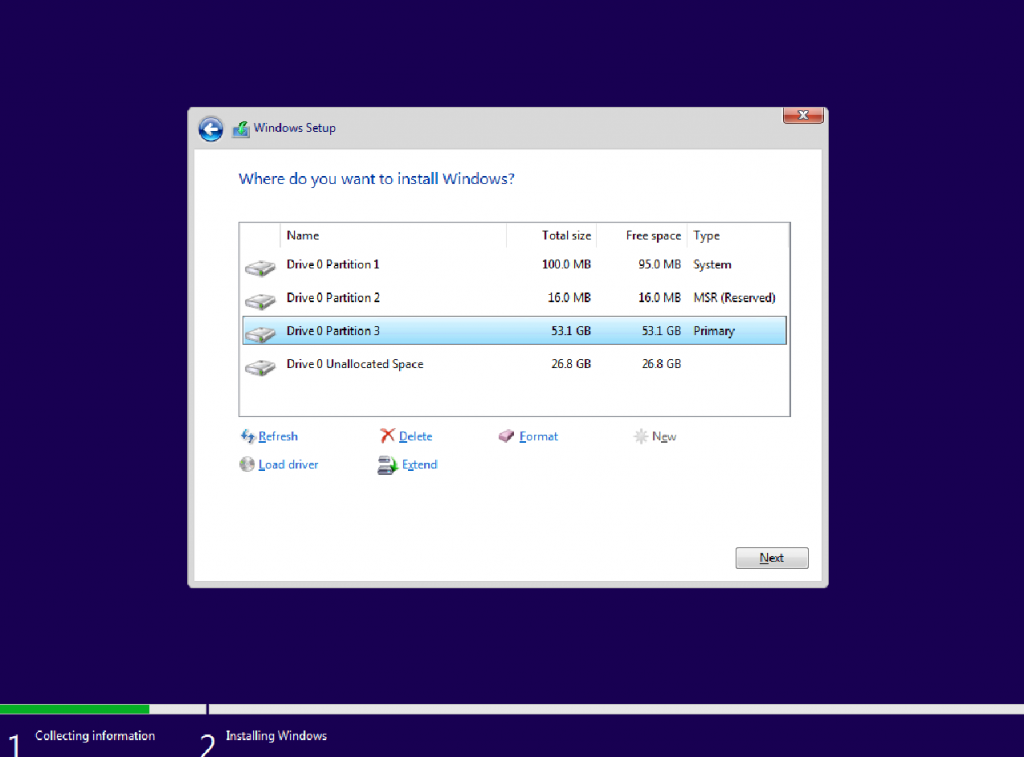
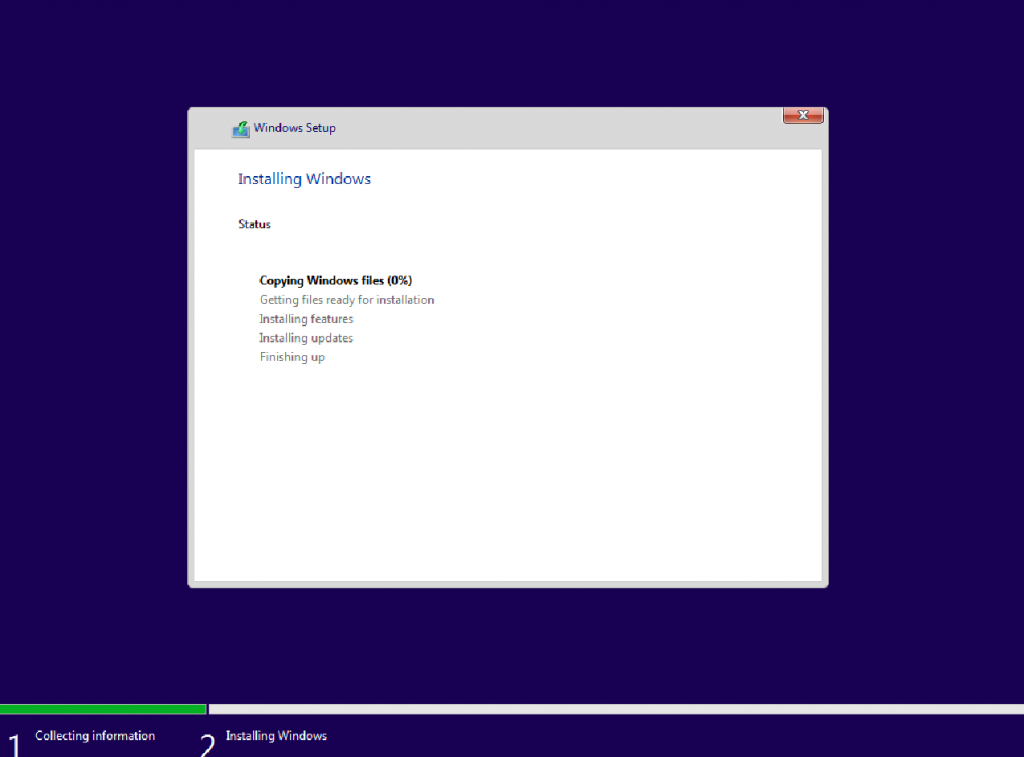
When you click on Next, Windows 11 will start installing on your new PC, which takes 15-30 minutes.
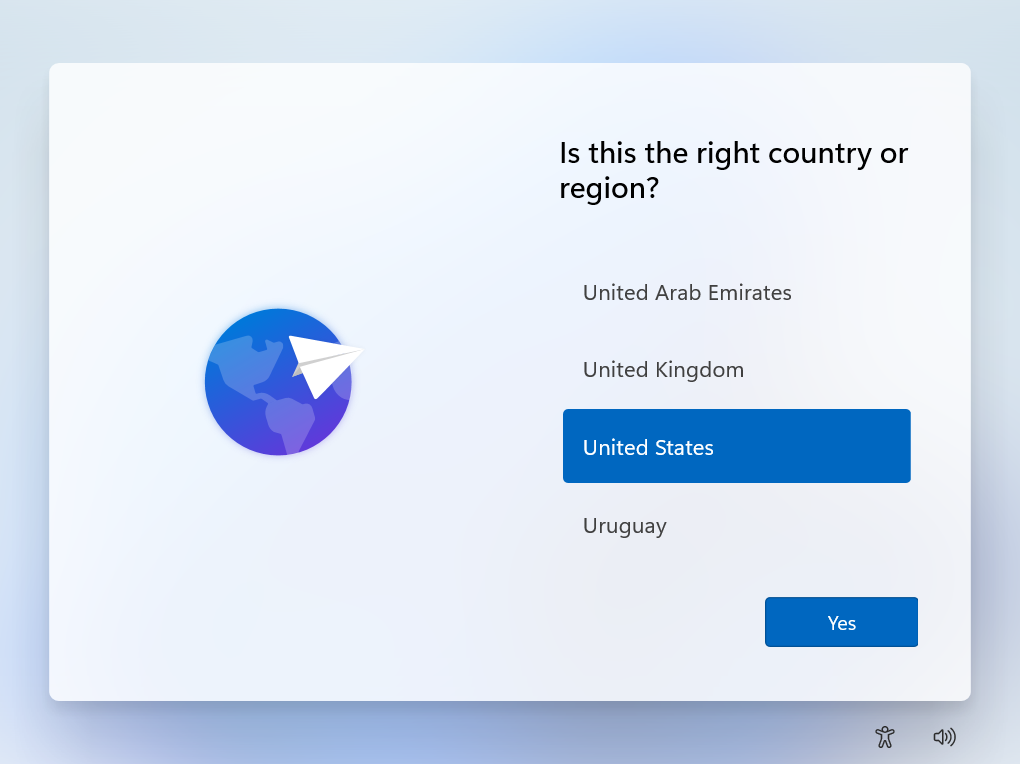
Step 9: After Windows 11 finishes installing, select your country or region and click Yes.
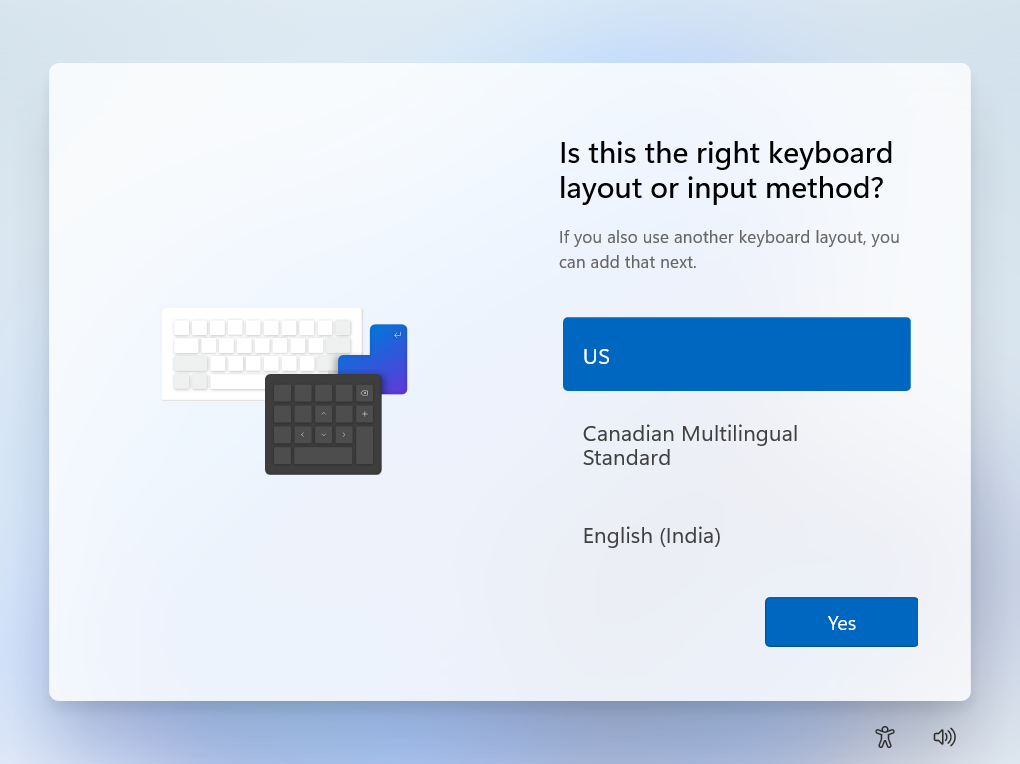
Step 10: Select a keyboard layout or input method as per your preference and click Yes.
Step 11: Type in a name for your PC and click Next.
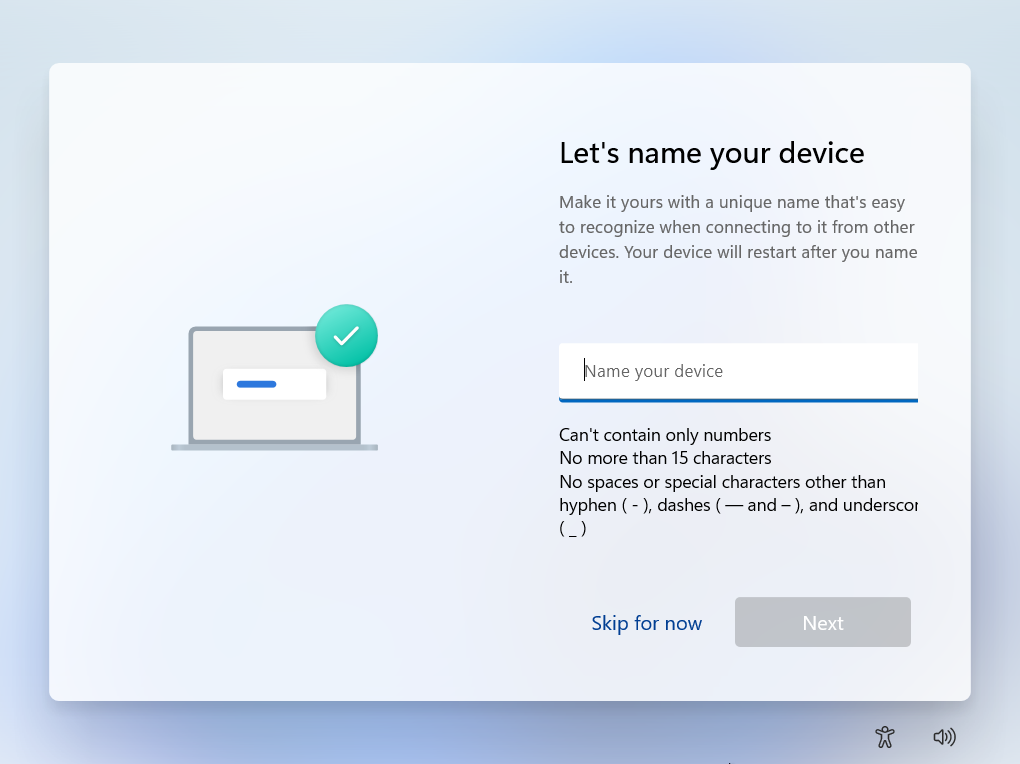
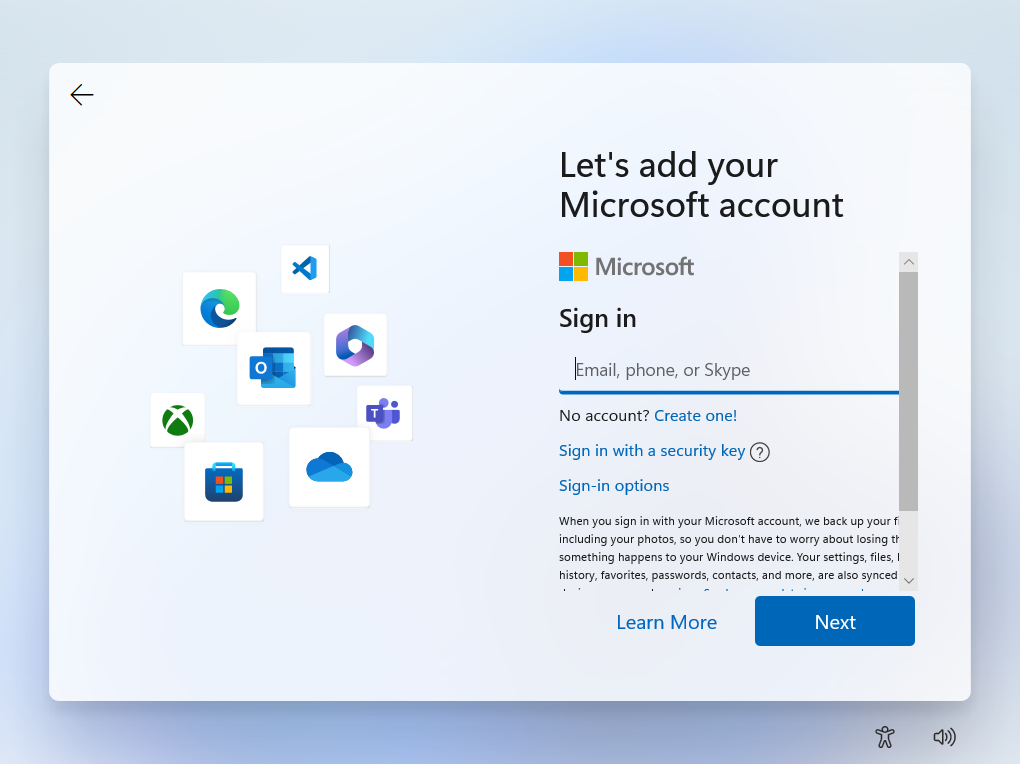
Step 12: Sign in to your primary Microsoft/Outlook account and click Next. You may click on ‘Create one!’ if you don’t already have a Microsoft account available.
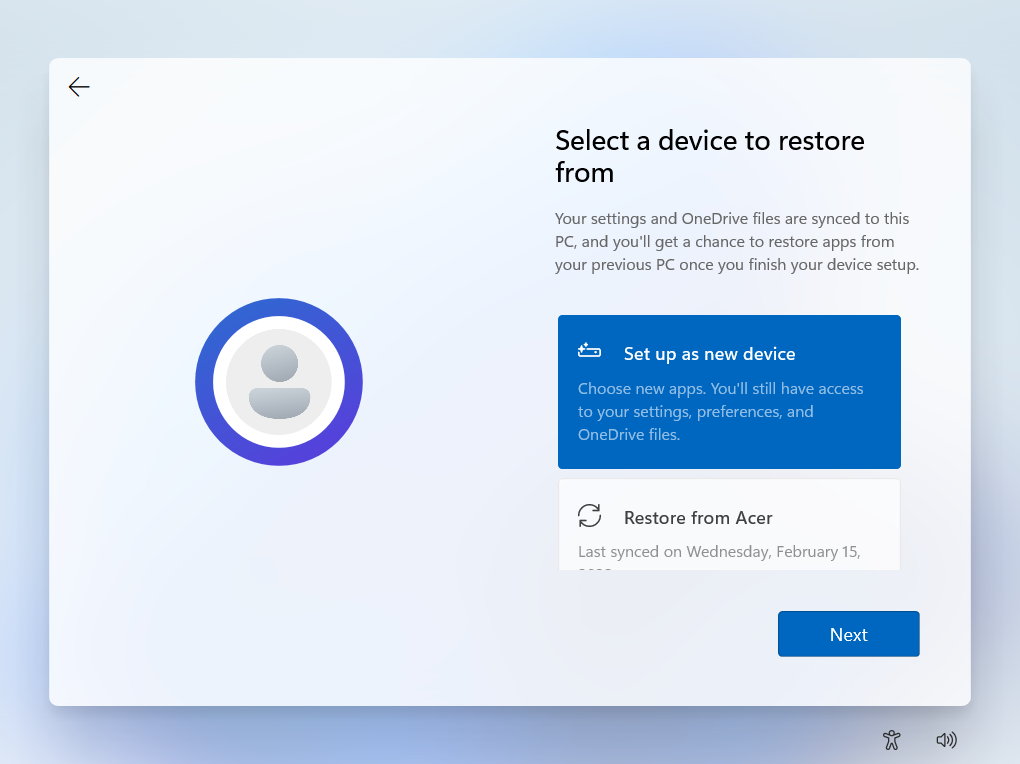
Step 13: If you have multiple devices linked to the same Microsoft account, Windows will ask if you want to restore settings and OneDrive files from your other devices. However, as this is your new PC, you might want to click on ‘View more options’ and select ‘Set up a new device’.
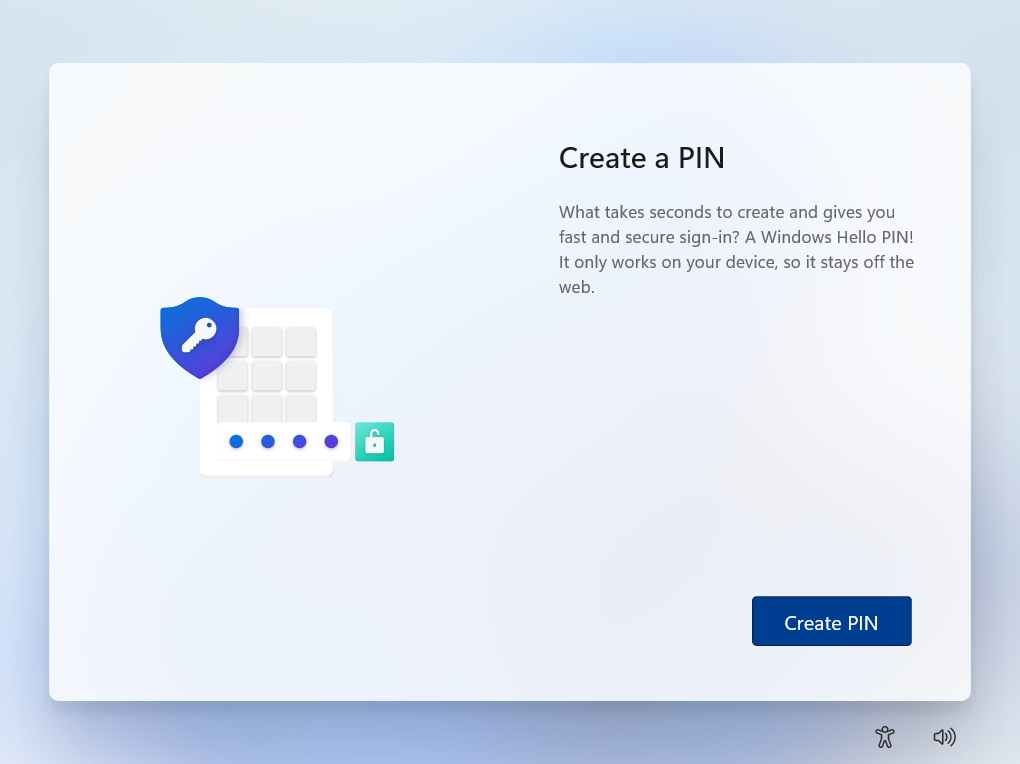
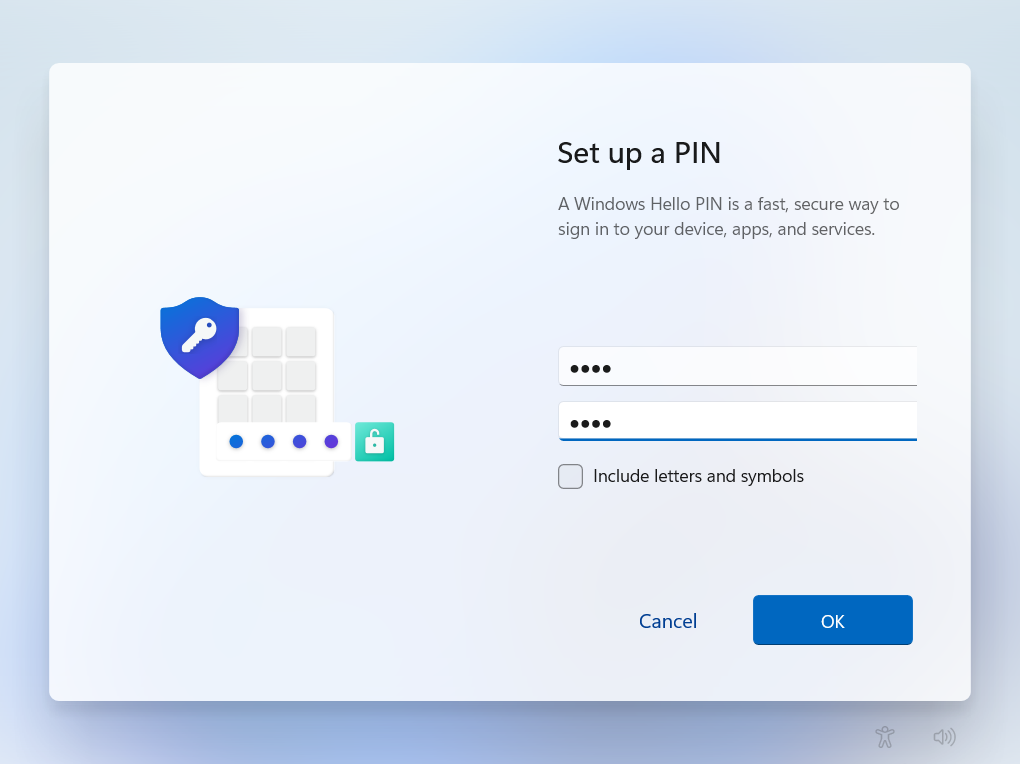
Step 14: Now click on Create PIN to create a numeric password to protect your PC from unauthorized access.
Step 15: Type a numeric PIN for your PC in the first text box, followed by the second, and click OK. If you want to create an even stronger alpha-numeric password, click the check box that says ‘Include letters and symbols’.
Alternatively, if you don’t want a password at all, leave both the text fields empty and click OK.
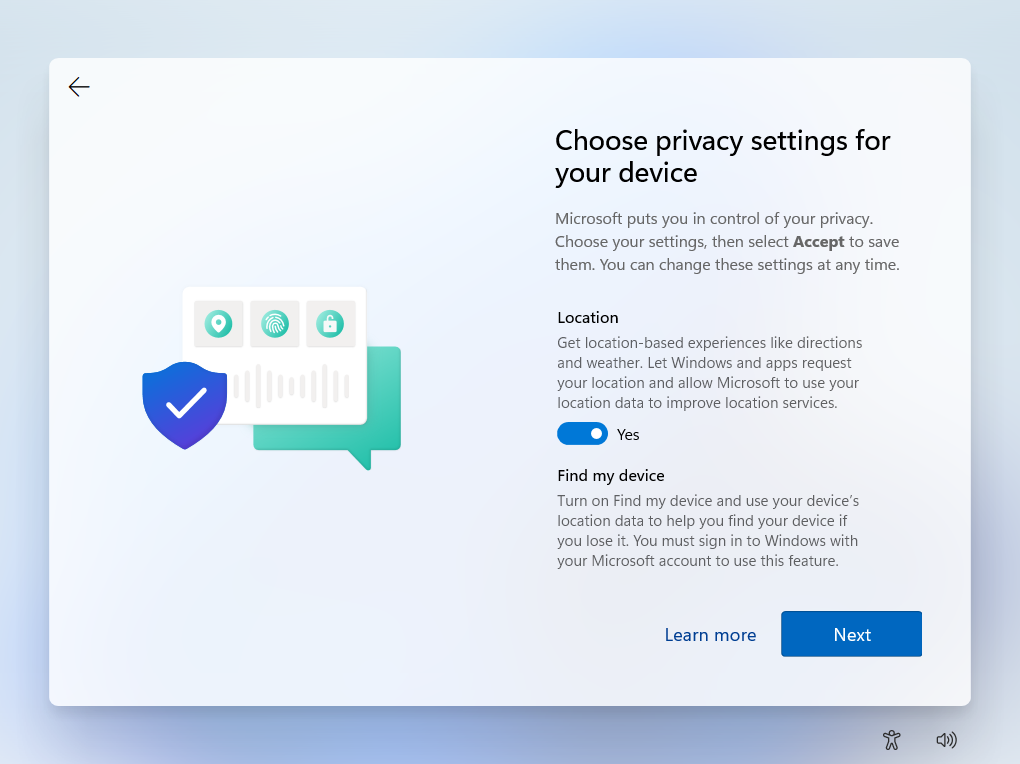
Step 16: Choose the privacy settings for your PC using the respective toggles for Location, Diagnostic data, etc., and click Accept. It’s recommended you turn everything OFF for improved privacy.
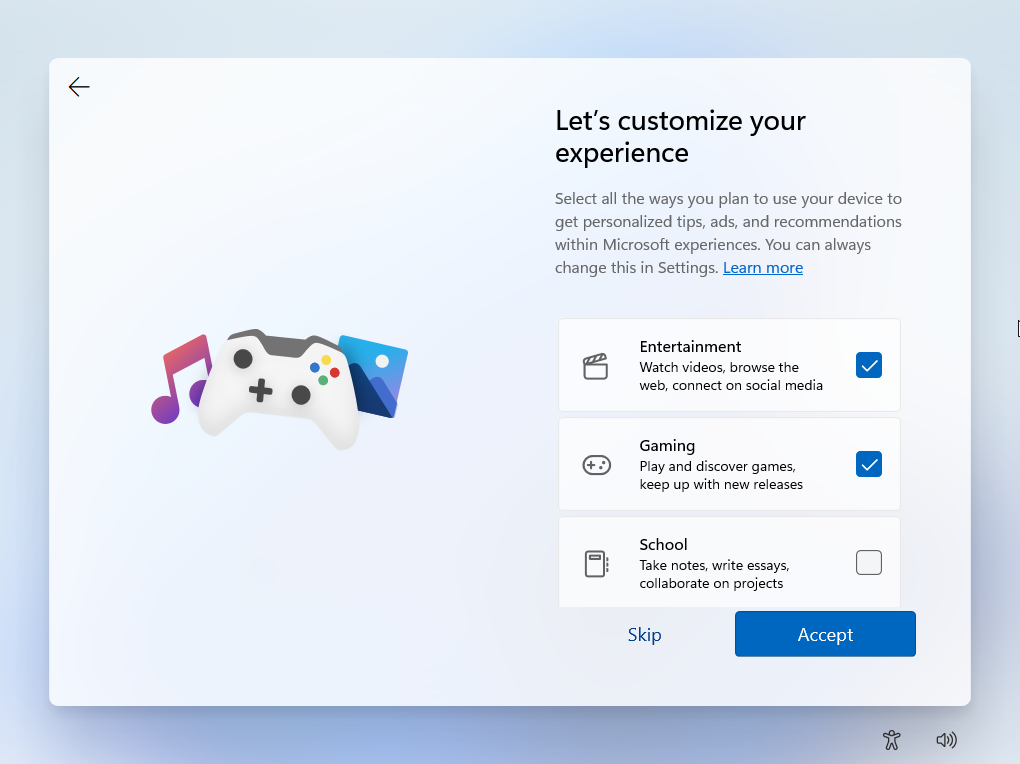
Step 17: Select what you plan to use the PC for by checking the respective check boxes. Then, click on Accept.
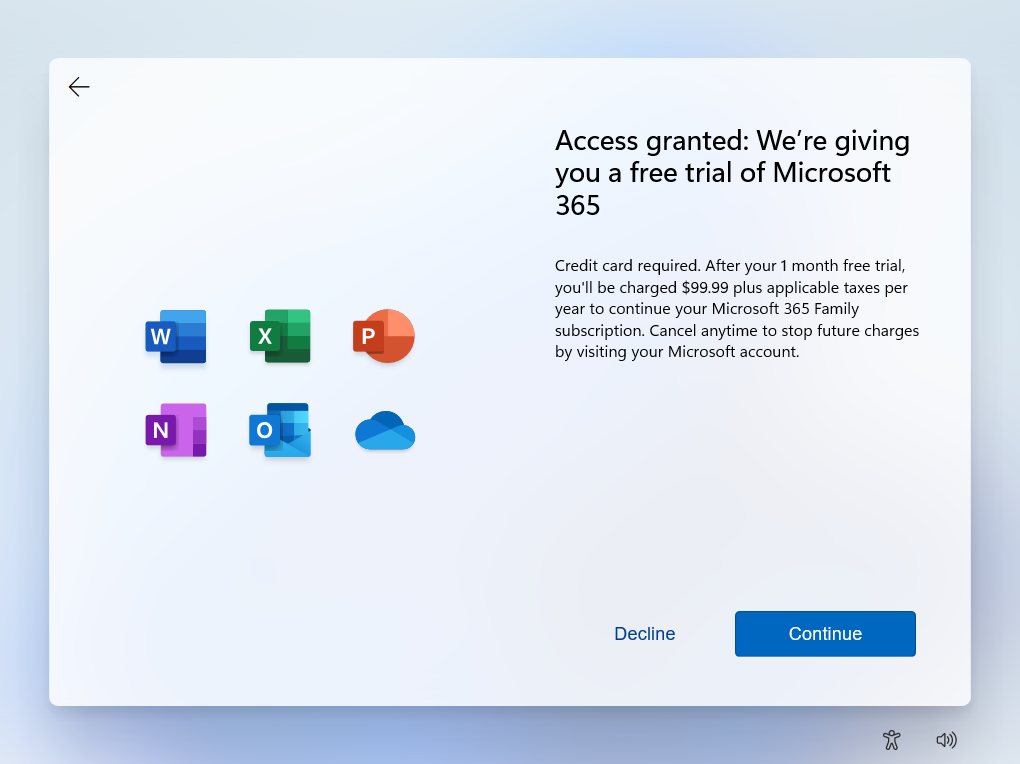
Step 18: Windows may try to offer you a one-month free trial for Office apps with Microsoft 365. You can click ‘Decline’ or ‘Continue’ as your preference.
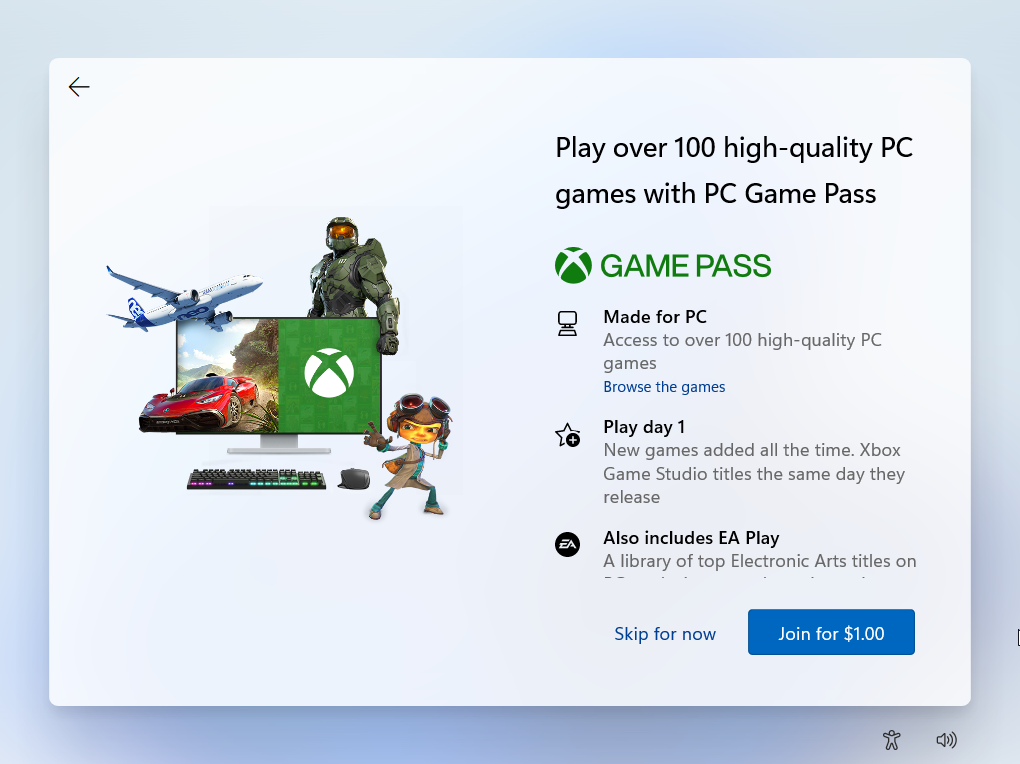
Step 19: Windows also offers a paid subscription for Xbox Game Pass at 1$ in select regions. You can click ‘Skip for now’ or ‘Join for $1’ as you prefer.
Once you complete these steps, you will reach a loading screen. This means you have successfully installed the operating system from the USB flash drive onto your PC’s HDD (Hard Disk Drive) or SSD (Solid State Drive).
Did you get some error and were unable to install the OS? Chances are your PC doesn’t meet the minimum requirements of an OS. Refer to the table below to learn more.
System Requirements for Different Operating Systems
| Operating System | Processor | RAM | Storage | Display & Graphics | Other Components |
|---|---|---|---|---|---|
| Windows 11 (64 Bit) | Dual-Core CPU Running at 1GHz | 4GB | 64GB | 1280 x 720 Display & DirectX 12 (WDDM 2.0) | PC should support Secure Boot, UEFI & TPM 2.0 |
| Windows 10 (64-Bit) | CPU Running at 1GHz | 1GB | 20GB | 800 x 600 Display & DirectX 12 (WDD 1.0) | None |
| Ubuntu | Dual-Core CPU Running at 2GHz | 4GB | 25GB | 1024×768 Display | None |
How To Create a Bootable USB Flash Drive?
If you have everything listed in the prerequisites section, and your PC meets the minimum hardware requirements to run your preferred operating system, you’ll need to download the operating system’s ISO file and create a bootable USB flash drive.
The bootable USB flash drive holds the files you will need to install an operating system on your new PC’s storage drive.
Many operating systems come with built-in tools to create bootable USB flash drives. However, I recommend using a free third-party Utility called Rufus to create a bootable USB drive for any operating system to make this process easier.
Here’s how you can download and use it on your PC:
Step 1: Using your other PC, download the ISO file for your preferred operating system by visiting the download page for Windows or Ubuntu.
Step 2: Until the ISO file finishes downloading, download Rufus from its official website and install it.
Step 3: Insert a blank USB flash drive (8GB or larger) into any USB slot on your secondary PC.
Step 4: Launch Rufus when both the ISO file for your preferred operating system and Rufus are available on your computer.
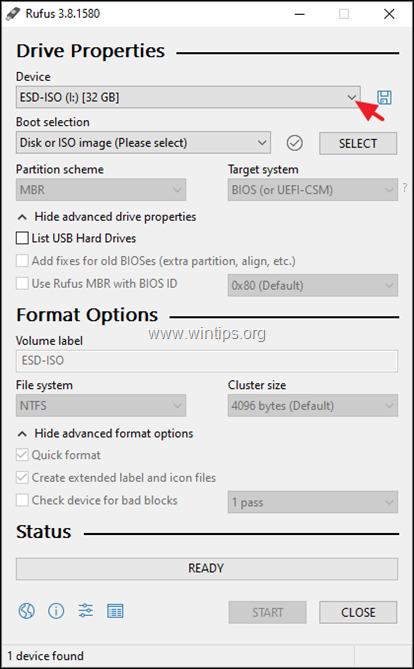
Step 5: Inside Rufus, click the Device drop-down and select the USB drive you connected earlier.
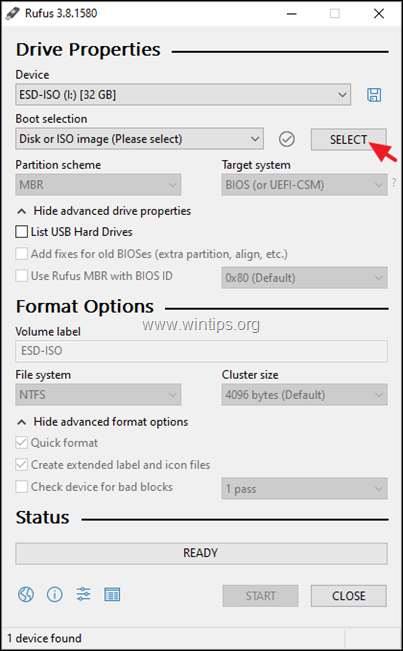
Step 6: Click the SELECT button to choose the operating system’s ISO file from your PC’s downloads folder. Then, click on Open.
Step 7: Rufus will automatically select the suitable options for you, but you may change them if necessary. Once everything is configured correctly, click on START and wait for the process to complete.
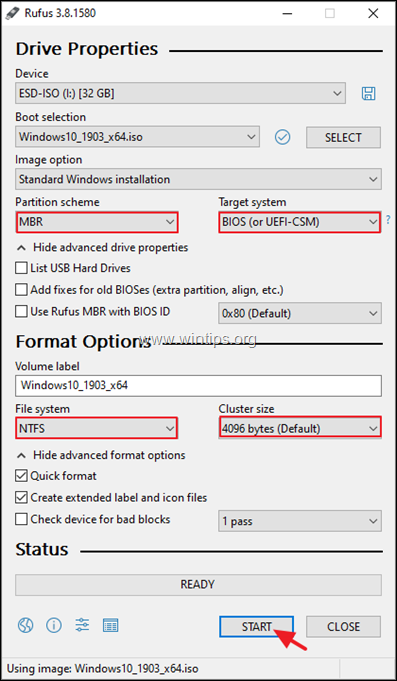
After successfully creating a bootable pen drive, installing it on your PC is the next step. Jump to the OS installation steps.
Things To Do After Installation of Operating System
After installing and setting up your PC with an operating system and arriving at the desktop, you can shut down and remove the bootable USB flash drive. Then, start your PC again.
In most cases, the next time your computer starts, it should automatically boot from the drivers installed on your PC.
If that doesn’t happen, you will need to change the boot order again and ensure that the primary drive is selected instead of the secondary drive if you have a PC with multiple drives.
With that out of the way, here’s what you need to do next:
Enter the Product Key & Activate Windows
Only applicable to computers with Windows, this step includes activating Windows using the product key to unlock all the features and receive new updates. If you need help activating Windows 11 or 10, follow these steps:
Step 1: Open the Settings app on Windows. You can also press the Windows + I keys to do this quickly.
Step 2: When the Settings app opens, click on Activation.
Step 3: On the Activation page that opens, click on the Activation state drop-down. The Activation state will appear as ‘Not active’ as you still need to enter the Product key.
Step 4: From the open drop-down, click the Change button beside the ‘Change product key’.
Meanwhile, If you don’t have a product key available, you may click on the ‘Open Store’ option and buy one from Microsoft. Then, follow steps 3 to 5.
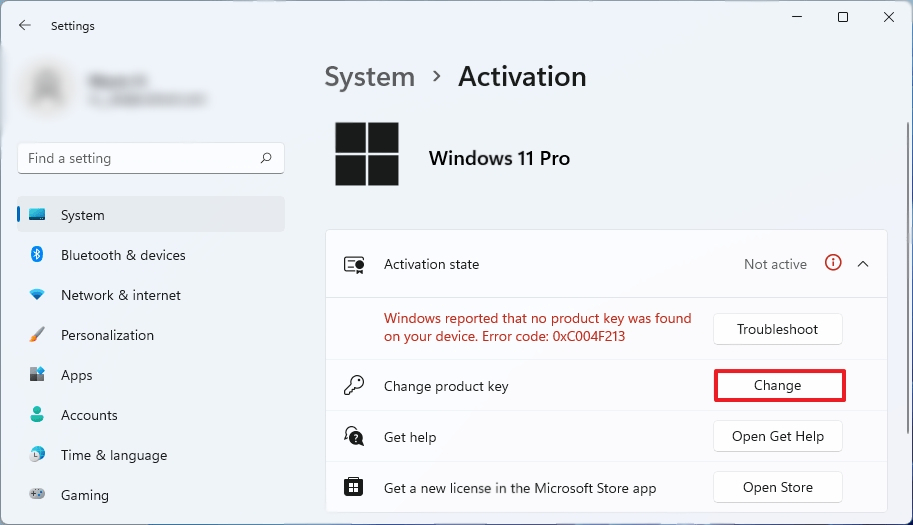
Step 5: When Enter a product key dialog appears, click on the text field and type the 25-digit product key for Windows 11. Then, click Next.
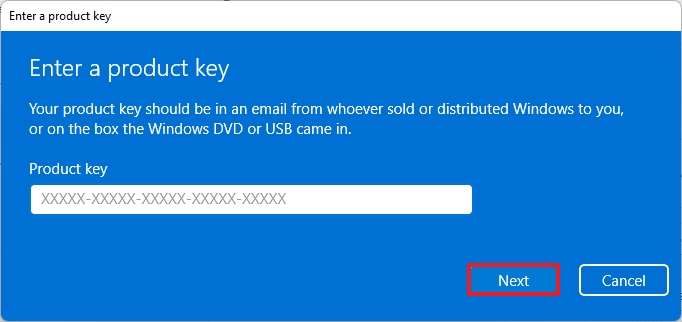
Quick Tip: You can also use a product key for Windows 7, 8, or 10 to activate Windows 11.
Complete System Updates & Configuration
After you finish installing Windows or your preferred operating system on your computer, it’s recommended that you check for new software updates and install them to ensure you have access to all the latest features and bug fixes.
Run Benchmarks and Install Apps
Next, you may want to run some popular benchmark tests, such as GeekBench 5 or Maxon CineBench R23, to test your new PC’s performance under heavy workloads and ensure that your new PC works as expected. After that, you can install all the apps and games you want on your PC.
Frequently Asked Questions
The four most common types of OS installations include Virtual Installation, Clean Installation, Dual-Boot Installation, and Upgrade Installation.
Buying an OS when building a PC is unnecessary, as you can create your own installation media. However, if you don’t want to go through the hassle of creating a bootable USB drive to install an operating system, you can buy a physical installation of Windows when assembling the computer.
No, you don’t need to install Windows 10/11 Pro for gaming. Although Pro editions of Windows offer some advanced features, they are mostly targeted toward organizations and enterprise users who can benefit from more user control and flexibility.
Generally, installing an operating system without a USB flash drive or CD is impossible. However, you can opt to get a drive that comes pre-installed with an operating system if you want to skip installing it.
Yes, installing two operating systems is possible if installed on separate drives. However, it requires tinkering with the BIOS Boot Order whenever you want to switch operating systems, which can be a hassle.
Conclusion
That’s it! Following the steps outlined in this guide, you should have your preferred operating system up and running on your new PC within half an hour.
Besides that, it’s recommended you keep the bootable USB drive for the operating system somewhere safe. A bootable USB drive can be useful if you ever need to use system restore to revert the operating system to a usable state or reinstall the operating system from scratch in case of a critical software/hardware issue.

Leave a Reply